
The building of the 3D printed JN4D Jenny aircraft model has been interesting to say the least. It has been some time since I've done any model building of aircraft much less one without instructions. The fuselage looked to me to be a simpler portion of the model to build than the wings. Boy was I wrong! The trick with the fuselage was to figure out what had to be built first and then go from there. Then figure out how to hold all the pieces in place while the glue was drying. So with that in mind I will cover my progress and how I solved these problems in this post.

As with the wings I needed to first assemble both sides of the fuselage on my bulletin board that was covered with plastic wrap. Each side of the fuselage was printed in three sections. These were glued and pinned done to the bulletin board and then left to dry. The photo above show the sides just after I removed all of the pins. So far so good.

Next I had to figure out how to mate the two sides together to for m the fuselage into it's correct 3D shape. I was lucky enough to find some clamp on clothes pins as they held my parts tight enough while the glue was drying to get it set up correctly. In the design at the mid section of the fuselage is a small rectangular frame. This part ties the lower wings together at the fuselage and helped with this portion of the build. At the tail it was a simple matter of gluing the end of the fuselage tail sides and clamping it together with a clothes pin. The tail of each side was designed with the correct taper already built into it so it would line up correctly when glued. At the nose of the fuselage I mounted the engine side covers and taped them in place to hold them securely.

After a few hours of letting the fuselage dry I was able to mount the front seat into it's proper location in the fuselage. The vertical pieces sticking out of the top of the fuselage are wing struts that hold the upper wing in position just above the front seat. The sides of the fuselage where the seats need to be have indents designed into them so that mounting the seats with their frames would be easier.


Next the front cowling over the nose and front seat were mounted using painters tape and a couple clothes pins. This was left to dry for a couple more hours.

Here you see the nearly completed fuselage really starting to take shape. I now have the rear cowling and seat in place along with the vertical supports for the rear turtle deck. More bracing will be added to the underside of the fuselage along the tail section once I get farther along with this portion of the build.
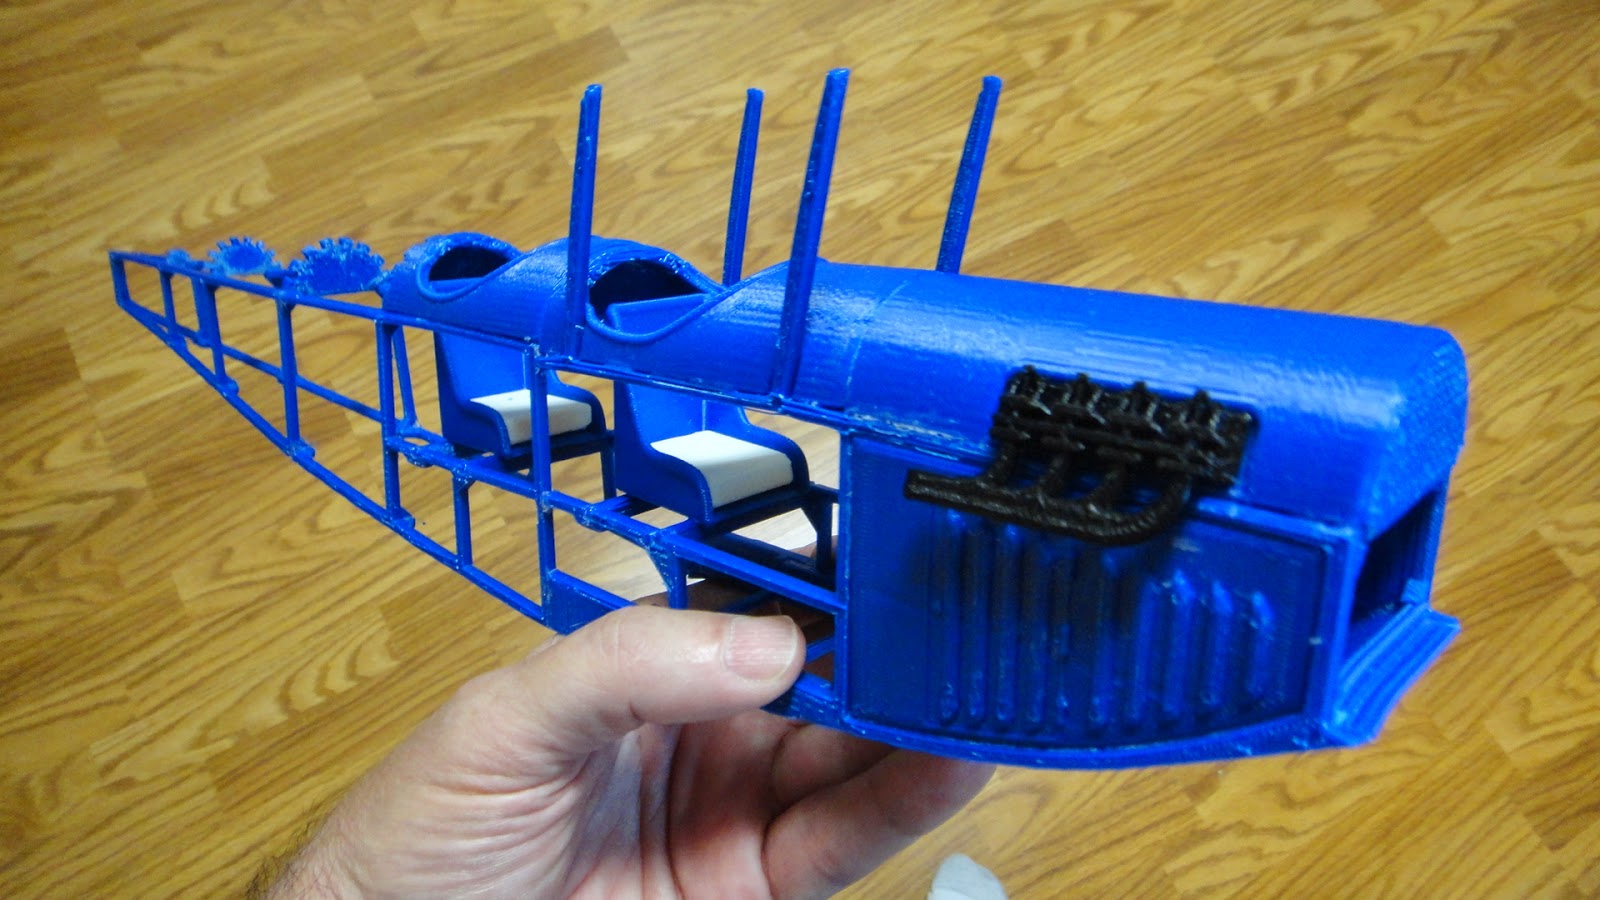
The engine detail stands out nicely now on the front cowling. The radiator and propeller will be added near the end of the build as I do not want to risk accidentally breaking the prop during the build. At this point in the building of the fuselage it has become a lot stronger and I managed get it everything pretty well lined up to make it presentable for display. The fuselage also at this point is 19 1/2 inches long and 2 inches wide. From the bottom of the fuselage to the top of the wing struts is 4 1/2 inches.


The stringers for the rear turtle deck I glued into place this morning. I was thrilled that these small intricate stringers slide into place perfectly right from the start. I would have thought they would have been worse than putting the wings together. Go figure. This section of the fuselage will really be a lot stronger because of these stringers. It only took me about five minutes or so to put this portion of the fuselage together. I taped the stringers down with painters tape to hold everything into place until the glue dried properly. The very tail of the fuselage will support the horizontal stabilizer nicely.

Here is the horizontal stabilizer (on the left) and rudder (on the right). The horizontal stabilizer is fairly large. It is 8 3/4 inches wide and 5 1/4 inches tall. The yellow color will stand out nicely with the blue fuselage. I will still need to create additional bracing for the underside of the horizontal stabilizer assembly but will not do so until it is in place on the fuselage. This will be a simple matter of measuring where the mounts will be and doing some trial fit up to dial it in for the model.
I should have the ailerons assembled today and be ready for final assembly of the model in the next few days hopefully. Will make a nice display for my work room. Stay tuned for further progress and photos of the 3D printed JN4d Jenny aircraft model.
No comments:
Post a Comment