
The Christmas rush has finally come and gone and I am now able to get back to the blog and post something that I have been waiting to show everyone since last September. I created something special for a close friend of mine who is big into fishing. I am not but I knew that he is and so the idea for the gift was born.
In the Midwest everyone knows about Wisconsin and the state being the dairy state. With that also being famous for cheese. I know this very well as having grown up in this great state and once again living in it. Along with the famous cheese, Wisconsin has also created what else? The cheese hat of course! With that thought in mind I put a twist on the hat idea and created a special hat of my own for anyone into fishing. I call it the Bob-R hat.

Here my friend Garry is happily modeling my creation that I made for him for Christmas. With this post I will show you how I put it all together.

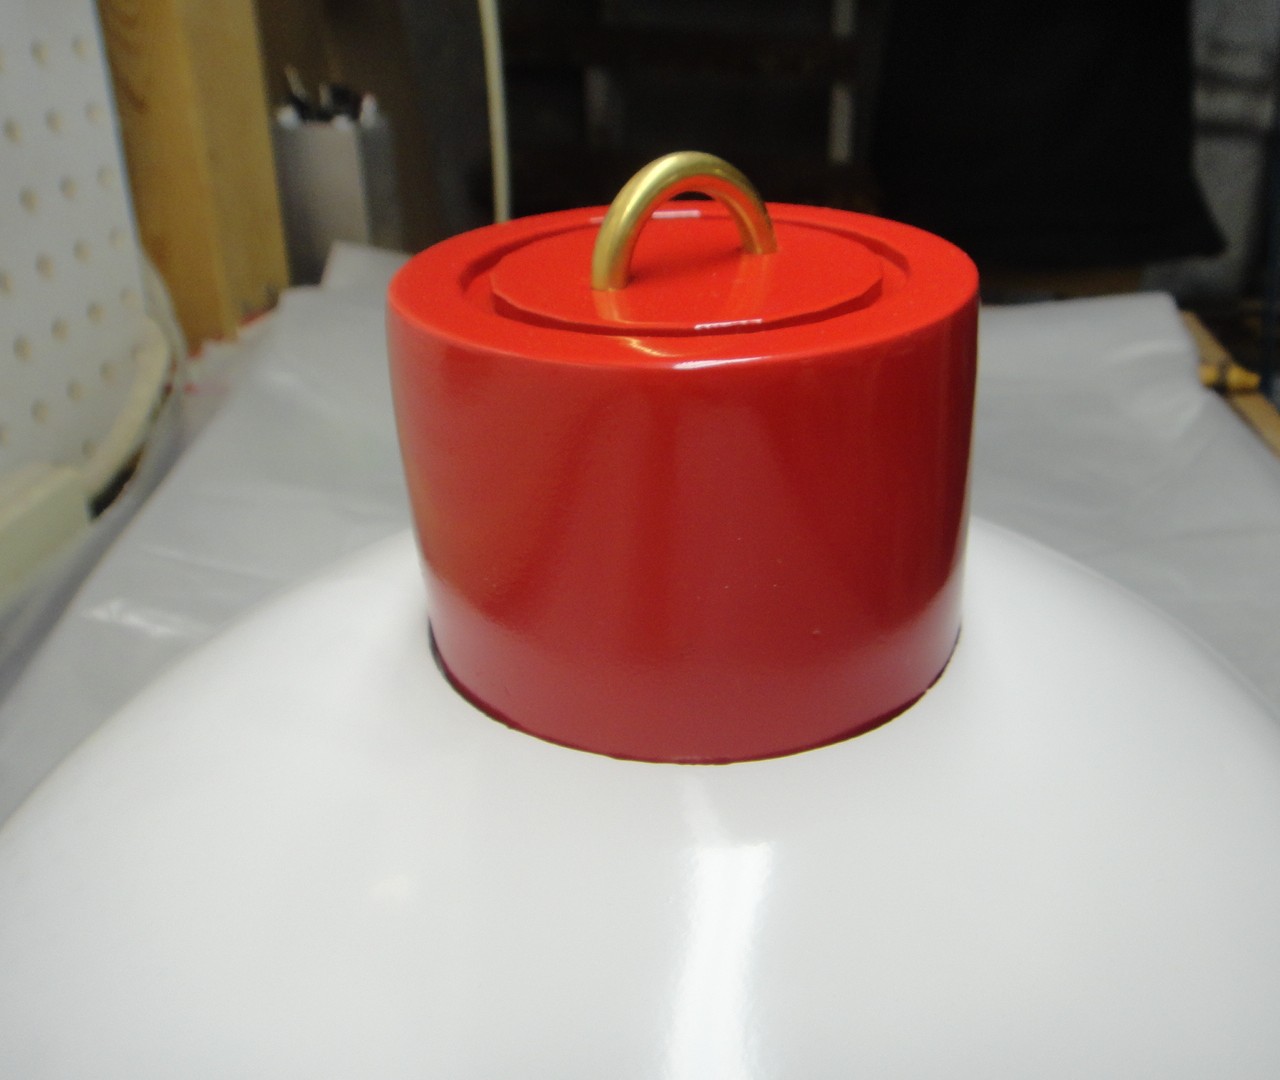
I had to create the top of the bobber button first in my computer. This will make more sense as I progress with the photos in this post so bear with me.

The red disk was printed on my Makerbot 3D printer and then bonded onto a styrofoam cylinder. After the epoxy had cured I wrapped the assembly with a couple layers of fiber glass cloth and resin, let it cure over night and sanded smooth everything smooth.

Next work began on a styrofoam hollow half sphere that I found at a craft store. After fiber glassing the outside of the dome I made a cut out to receive the bobber button.


This ring was slid into the cut out in the dome.

The inner portion of the cavity was then filled with fiber glass resin and a micro-balloon mixture. This mixture was poured into the cavity and then left to cure over night.

After the resin mixture had cured I trimmed off the excess portion of the ring to make it flush with the top of the dome.

The bobber button was then inserted into the dome to double check the fit.

Along with the button a brass ring needed to be added to complete the look. This ring was created by taking a brass rod and clamping it into a vise with a one inch steel pipe. With it being clamped in place I only had to take the rod and bend it around the pipe. I then cut it to size using a Dremel tool and inserted the loop into the two holes that were modeled into the red disk.

These strange little pieces were created on the Makerbot 3D printer to hold the head band into place inside the hat. This took about three tries to get the shape just right but it was worth the effort.


Several more coats of primer later and a lot more wet sanding and the dome is near ready to be painted with several coats of gloss white paint.

The button for the hat was painted bright red and turned out perfect.


The hat is also wet sanded and painted with primer over and over until the surface is super smooth. It doesn't look pretty here but the effort put into the hat at this point like the button pays off later.


After the white paint had dried on the dome for a couple of days I was then able epoxy the red button into the top of the hat to mount it securely for good.

An adjustable headband was next inserted into the mounting blocks inside the helmet. This makes the hat easy to wear and will actually keep your head cool in hot weather.

The finishing touch to the Bob-R hat is the decal that I designed for the back. I had this made for the helmet by a car place that makes decals for cars. They were more than happy to work on something different. It really makes the helmet stand out that much more. As if it needs to stand out any more than it already does.
Here is a video I shot of my friend Garry opening up his very special gift. The reaction to his present made the project all worth while. As usual here at the Tinker's Workshop I tend to design and build some pretty interesting projects. This one has got to be one of the most "Different" kind of projects to be sure. Interesting and different in the same breath.
No comments:
Post a Comment