A couple of months back I was experimenting with a new app for my iPad. This app allowed me to create stop motion animation. I have dabbled in this medium on and off over the years and so when I found this app and I knew that I wanted to work with it again. The only problem I had with trying to use the app was holding the iPad still in one position to take the individual shots for the animation. This turned out badly from the start as it was near impossible to do without moving the iPad and ruining the project from the start. Inspiration struck at that point and another new project was born.
This is the mount that I came up with for my Ipad. It is adjustable so that you can use it either in portrait or landscape mode. The mount is 10 3/4 inches long, 4 3/4 inches high, and 1 3/4 inches deep. It took around 12 hours to create using my Makerbot 3D printer and only weighs 8 ounces! Best of all the total cost to make the mount came to just under $10.
The mount is made up of five printed pieces. Two sliders (in white), two end caps (in blue at the top of the photo), and the mounting bar shown (in blue at the bottom of the photo). The hardware that is needed for the project are two 1/4 inch x 2 inch machine screws, one 1/4 inch x 1 inch bolt, one small washer, two 1/4 nuts, and one 1/4 inch threaded rod connector.
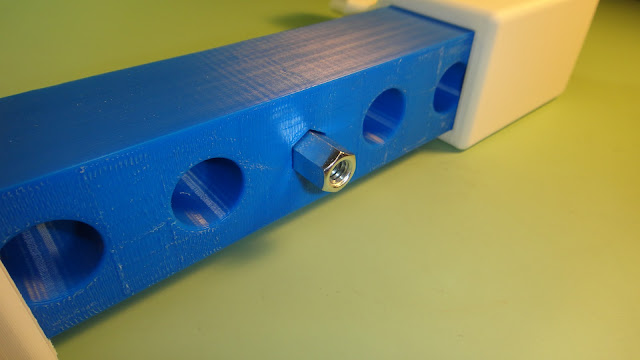
The mounting bar shown here is actually a pretty intricate part. In the center there is a hole made for the threaded rod connector so that it slides in easily without binding. Also on both ends of the bar are openings for the 1/4 inch nuts that need to be inserted from the two large outer holes that you see in the photo above. The holes for these nuts are six sided so that the nut will not spin when the two end caps are mounted to the bar.
Here is a good shot of all the components for the mount. The end caps have a extrusion that mates up to the recessions on the ends of the mounting bar. This keeps the end cap from spinning once mounted to the bar.
After the nuts for the end caps have been inserted into the main bar the two sliders are mounted and positioned as shown above during the assembly the the Ipad mount.
One of the end caps is shown here ready to be mounted to the center bar. With the 1/4 inch nut already inside the bar it is simple to slide the end cap into position and screw in the 2 inch x 1/4 inch machine screw to hold everything together.
This is what the end cap looks like once it has been mounted and the slider moved to it's outer position.
Next the threaded rod connector is put into the center of the mounting bar. This again is held into place with the 1/4 inch x 1 inch bolt. This will keep the threaded rod connector from falling out.
Here the Ipad tripod mount is set up and ready to use as teleprompter in landscape mode. The threaded rod connector in the mount receives the standard threaded camera machine screw that is on the tripod. It takes all of 30 seconds to put the Ipad mount onto the tripod or take it off.
Here another shot of the mount in portrait mode. The capability of the mount to change from one mode to the next is a simple matter of moving the sliders into position.
The mount will be useful as you see here but also for stop motion animation that I spoke of earlier. I also have an app for my iPad that takes time lapse video. Again this will be a great use of the iPad mount and should eliminate a lot of hassle in using the apps mentioned here. Also this would work as a great video camera or photo mount using the iPad. It will be a nice addition to my iPad and I'm sure I will find more uses for it as I go along. Have a good day and keep tinkering!


No comments:
Post a Comment