
About three weeks ago I put out a post about my glovebox project for my dune buggy. I am again happy to report that I put the finishing touches to the project yesterday and have it fully installed into my little buggy.

This is where I left off on the last post. The outer frame for the door had been attached to the body of the glovebox. In the bottom of the glovebox you can see a cutout that was needed to allow room for a mounting point that is on the roll cage in the car. Without this cutout the glovebox could not be installed.


To clean up the opening that I had made for the roll cage mount I 3D printed a small blister that would be mounted over this opening. This as you can see was a very small part so it took very little time to get it sanded smooth so that I could put a nice coat of primer on it.

This is how the blister looked once it had been mounted on the inside of the glovebox. Already a big improvement over the hole that was there.


Next I had to check out the clearances for the door for the glove box along with the mounts that would only allow the door to pivot 90 degrees when I wanted to open it. This all worked out fine as you can see. The door handle/lock mounted up fine but I still needed to make sure that the latch for the door would work properly.


For the glovebox I tracked down an original door handle/lock from a Volkswagen Beetle for it online. This was new old stock and cost me less than $20 so it was just what I needed.
I knew that I did not want the striker for the lock to be made completely out of ABS plastic from my 3D printer. The striker needed to be made out of metal otherwise the parts would wear out very quickly. I created the striker from a small piece of aluminum I had in my supplies in the shop. It took me a little time to make but in the end I got a very nice striker put together.
The yellow part in the upper image is the striker slider. This part mounts the striker to the inside of the glovebox and is adjustable so that the door locks correctly. This little part I had to reprint on my 3D printer after my first attempt failed simply because it needed to be more solid. The original part had only a 20% fill. With this being that hollow it broke after only a couple of times trying to adjust it. I then modified the design just a bit to beef it up and increased the inner fill to 80%. This made the part very solid and strong that should last a very long time now.

With the new door handle/lock and latch assembly the door open and closed properly now. In the photo above the glovebox is really coming together with primer now being applied to the door.


The next process in the project was to getting the mounting holes drilled for the glovebox so that it would be set up for the car when the assembly was completed. I placed the glove compartment into the cavity in the dash where it would be mounted and then marked where I needed the mounting holes. The little blister in the interior of the glovebox worked out perfectly to at this point so the glovebox slide into place with no problems.


After having drilled the mounting holes for the glovebox and making sure all of the hardware to mount it worked properly I then returned to my little spray booth and started priming the glovebox inside and out.

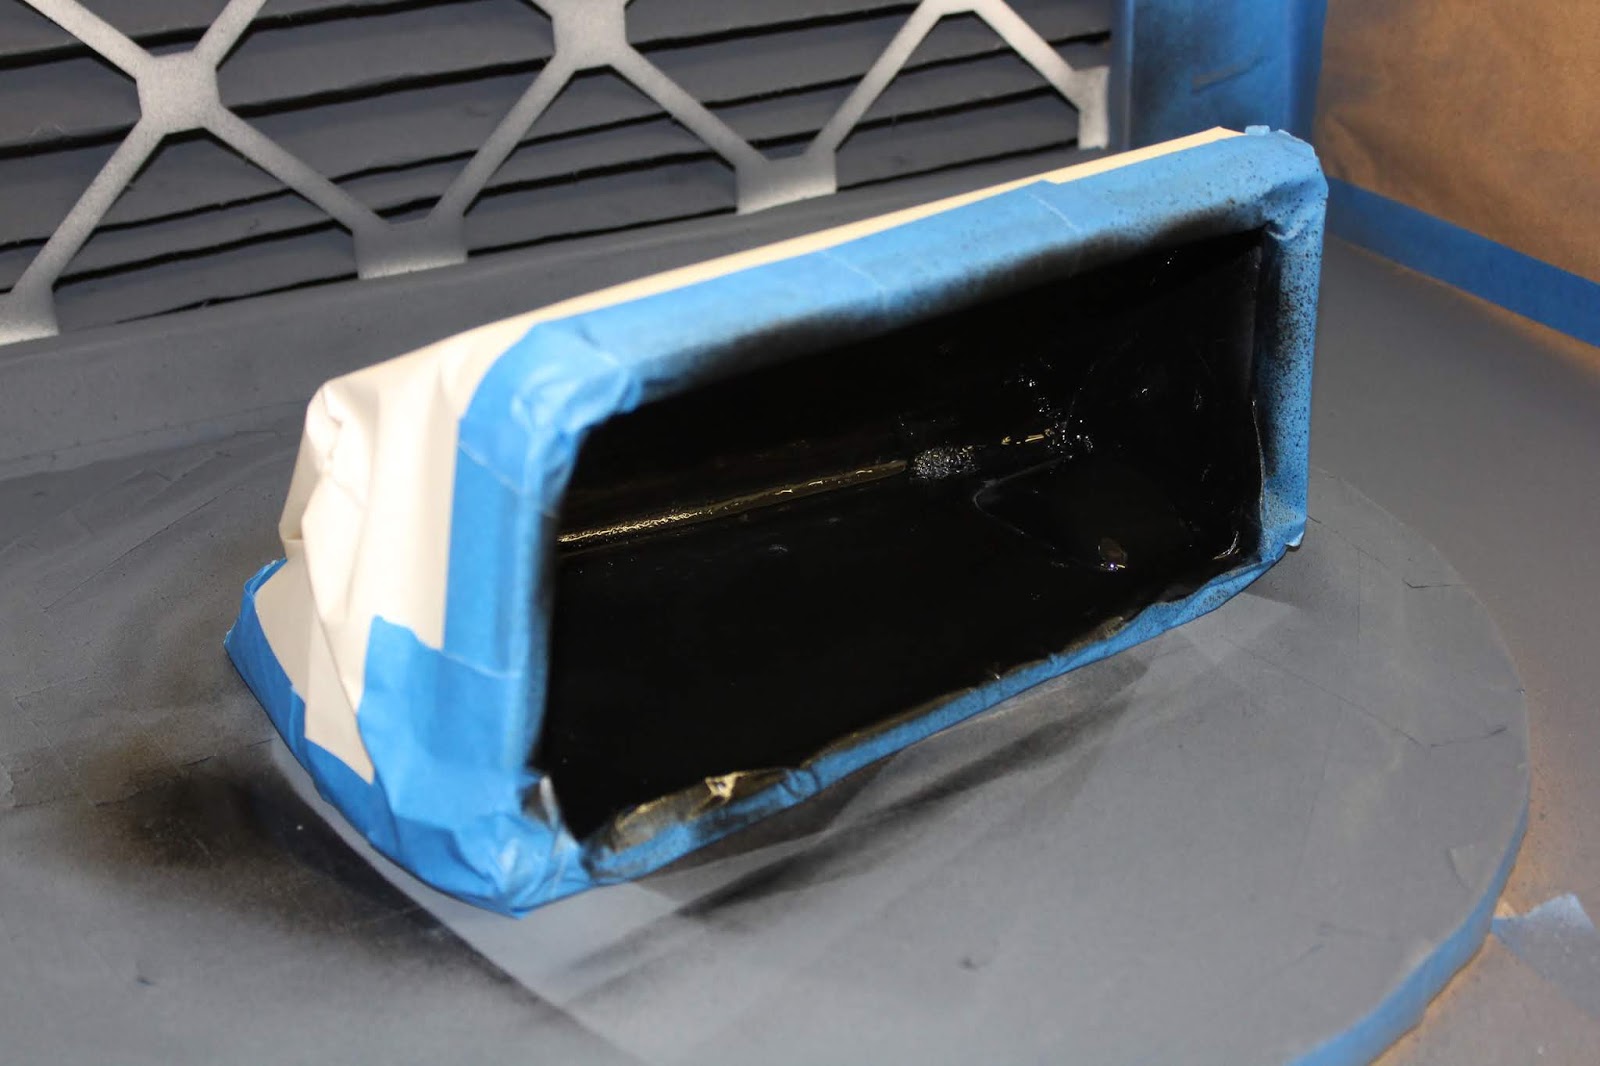

After I had primed and sanded and primed and sanded the glovebox three or four times I was finally rewarded with a nice smooth exterior ready for paint. I knew that I wanted to black out the interior of the glovebox so I taped everything off on the exterior and sprayed the interior a nice semi-gloss black. This turned out very well and went quicker than I had hoped.


Again I repeated this process but in reverse. I taped off the interior of the glove box and sprayed the outside a nice glossy red. I was happy that I was able to lay the paint down with no issues and it turned out nice and smooth.


After the paint on the glovebox had dried for several days I was rewarded with the installation being completed in short order without any major issues. The paint I had used on the glove box is a very close match to what is used in the dune buggy so another win for sure.
I was able to mount a black piece of fender trim around the outer edge of the glovebox where it meets the dash and it sets off the installation perfectly. Like the glovebox had been there since the car was assembled. Works for me. Now I have the perfect place to store my registration and insurance papers along with whatever else I want to put in this nice new storage compartment. A perfect addition to the car that blends in nicely with the rest of the dash!
This is great. Thanks for sharing.
ReplyDelete