
It amazes me sometimes or should I say I amaze myself sometimes when a project comes together quickly and better than I had hoped. This has been the case with the little power trailer that I have been working on over the past few weeks. Another big smile on my face is the order of the day with this project and how it all turned out.


If you have been following along throughout the weeks that I have progressed with this project you will appreciate the transformation that has taken place on the little trailer and the vision that was in my head from the start. I got a real taste of what it is like for the guys that build custom cars or motorcycles that you see on TV. They build up the design and then take it all apart to have it painted or chromed and them put it all back together again. This is exactly what I went through only on a much smaller scale.


I had to post these photos again to show you the difference of how the trailer looked when I started the project compared to how it looks now. A great looking little trailer from the start but you cannot deny that my conversion is just a step or two up from where I began.

The whole purpose of the Ridekick power trailer is to make it easier to ride a bicycle up hills (or a velomobile in my case) for older guys (like me) or ladys of course. The trailer has a LIFePO4 30Ah lithium battery that is capable of traveling 35-40 miles at a speed of 20 miles per hour. This will be a huge plus for me to use with my velomobile that I built a number of years ago. Velo's are very fast on level ground but are notorious for being slow going up hill. Mainly because of the extra weight of the body which makes for slow hill climbing. But on level ground a standard bicycle does not have a chance against a streamlined velo because of less wind resistance unless you are an Olympic bicyclist. Not many of them around here where I live so I am safe.

I really like the look of the little trailer after my conversion. The fenders with the reflectors and the black painted bottom tub work very well together.

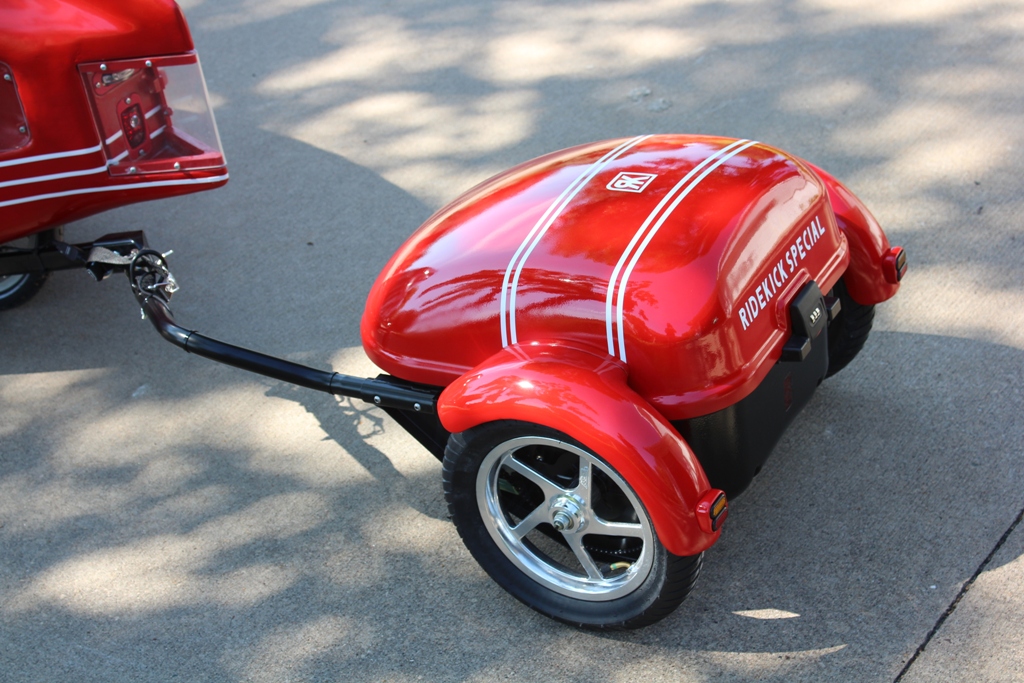
I was able to make my own decals for the trailer using my vinyl cutter and the stripes were a simple matter of using some white pin striping tape that I had stored away for just such a project.

With the LIFePO4 30AH lithium battery pack installed into the trailer there is still 41.8 liters of cargo space available to haul whatever I want to pick up (groceries?) or take with me like something cool to drink, camera gear, or a jacket. So the trailer serves several purposes all at the same time.

Here is a good look at the battery pack that is in the trailer. It is held securely with a Velcro strap and is plugged into the controller located at the back of the trailer. I charged up the battery that was completely dead for the first time and it took around three hours to bring it up to a full charge. This is nice to know as I am sure I will never run it completely flat again so charging times will be less when the time comes.

With the new trailer being planned for use with the velmobile I had to design a trailer hitch to make it all work. The little trailer is designed to be connected to a bicycle or recumbent trike at the rear axle. The problem with the velomobile is that the body covers up the rear axle so I had to figure out how to make a hitch to get the mount located more rearward. I started with an arm for the hitch that was simply made with 1/4 inch plywood layers. I cut one to the shape I had worked out and then traced a half dozen more on to my plywood panel.

After cutting the parts out on my bandsaw and sanding all of the pieces of the trailer hitch arm into the exact same shape I fiber glassed the assembly together in layers to make up the arm you see pictured above. The arm had one layer of plywood, then a glass layer, another layer of wood, then another layer of fiber glass and so on until I got the thickness that I wanted for the arm. I was more than happy I had enough clamps to secure everything while the fiberglass cured overnight.
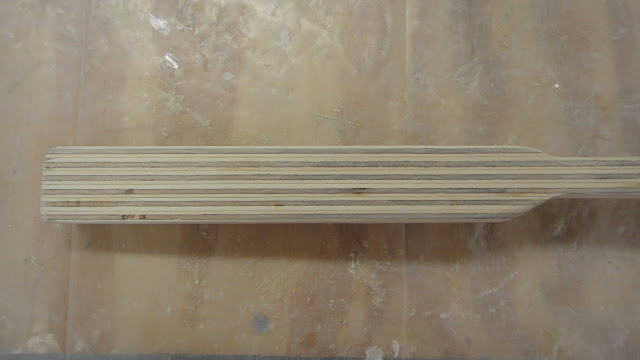
Once the sandwich layers of wood and fiberglass had dried I was then able to sand the new arm down to get a nice smooth shape so it would be proper for several more layers of fiberglass on the outside of the arm.


I then drilled the required holes into the arm for the mounting tubes that would tie it all together in the final assembly that would mount to the frame of the velomobile.

Once I had gotten the arm fiberglassed I then smeared on a layer of epoxy/micro-balloon mixture. This is like a putty that I mix up to fill the weave of the fiberglass cloth. Most of this is sanded off smooth to prep it for priming and painting.


After the primer had dried I was able to lay down a couple of nice coats of black paint. The arm at this point is ready to be assembled to the velomobile and is strong enough to run over with a car and not break. Simple, strong, and an easy trailer hitch arm assembly.

This image above shows how the trailer hitch is attached to the rear mount of the velomobile frame. The black fiberglass arm is mounted to the frame using 1" aluminum tubing that is connected to 90 degree steel mounts that in turn are mounted to the rear axle arm of the frame. All the mounts were then secured using locknuts.


Here is the reason for the eye bolt. On the trailer hitch is a safety strap that works just like a car trailer using safety chains. This strap gets fed through the eye bolt and then back through to the trailer to add a bit more safety in using the trailer. In the photo above you can see to the left of the eye bolt a cable connector. This connector is for the accelerator cable. A variable speed thumb switch is mounted on to the handlebars of the velo and then connected with the accelerator cable to the little trailer at this point. Makes it easy to attach or remove the trailer from the velomobile.


With the new trailer being planned for use with the velmobile I had to design a trailer hitch to make it all work. The little trailer is designed to be connected to a bicycle or recumbent trike at the rear axle. The problem with the velomobile is that the body covers up the rear axle so I had to figure out how to make a hitch to get the mount located more rearward. I started with an arm for the hitch that was simply made with 1/4 inch plywood layers. I cut one to the shape I had worked out and then traced a half dozen more on to my plywood panel.

After cutting the parts out on my bandsaw and sanding all of the pieces of the trailer hitch arm into the exact same shape I fiber glassed the assembly together in layers to make up the arm you see pictured above. The arm had one layer of plywood, then a glass layer, another layer of wood, then another layer of fiber glass and so on until I got the thickness that I wanted for the arm. I was more than happy I had enough clamps to secure everything while the fiberglass cured overnight.

Once the sandwich layers of wood and fiberglass had dried I was then able to sand the new arm down to get a nice smooth shape so it would be proper for several more layers of fiberglass on the outside of the arm.


I then drilled the required holes into the arm for the mounting tubes that would tie it all together in the final assembly that would mount to the frame of the velomobile.

Once I had gotten the arm fiberglassed I then smeared on a layer of epoxy/micro-balloon mixture. This is like a putty that I mix up to fill the weave of the fiberglass cloth. Most of this is sanded off smooth to prep it for priming and painting.

Here the arm has been sanded and primed ready for paint.

After the primer had dried I was able to lay down a couple of nice coats of black paint. The arm at this point is ready to be assembled to the velomobile and is strong enough to run over with a car and not break. Simple, strong, and an easy trailer hitch arm assembly.

This image above shows how the trailer hitch is attached to the rear mount of the velomobile frame. The black fiberglass arm is mounted to the frame using 1" aluminum tubing that is connected to 90 degree steel mounts that in turn are mounted to the rear axle arm of the frame. All the mounts were then secured using locknuts.

Here's a good look at the new trailer hitch arm assembly mounted to the velomobile. The larger black portion on the end of the hitch needed to be added to the hitch to keep the male end of the hitch from rotating on a single mounting bolt.

This mount looks and works good but still was not correct at this point. I had to replace the bolt you see here with an eye bolt. (See the next photo). The cylindrical protrusion is the male mount that connects to the email mating mount that is on the trailer.

Here is the reason for the eye bolt. On the trailer hitch is a safety strap that works just like a car trailer using safety chains. This strap gets fed through the eye bolt and then back through to the trailer to add a bit more safety in using the trailer. In the photo above you can see to the left of the eye bolt a cable connector. This connector is for the accelerator cable. A variable speed thumb switch is mounted on to the handlebars of the velo and then connected with the accelerator cable to the little trailer at this point. Makes it easy to attach or remove the trailer from the velomobile.

Here you can see the safety strap in place running through the eye bolt. To connect the trailer to the velomobile all that you need to do is slide the female mount that is on the trailer over the male mount on the trailer hitch. Then a small locking pin is inserted into a mounting hole to secure the trailer in place. Then attach the safety strap and connect the accelerator cable. That's it. Takes less than a minute and your ready to go.

The overall look of the little trailer with my velomobile was a real eye catcher as I cruised around my little town this week. It was a real rush to drive the velo now with power for climbing hills. I was doing 19 mph going up one hill and had power to spare. On one level stretch I hit 22 mph. Pretty impressive for my first test run. Curious to see what the top speed of this set up will be. Mainly because the velomobile is so aerodynamic it slides through the air very easily. Much less wind resistance than a standard bicycle or a recumbent trike. Amazing to say the least and a real rush to drive!
So now I can put some real miles on the velo when I go cruising and enjoy the ride along the way. This was my goal from the start and now with the help of the little Ridekick trailer it has made it all possible. I think my mission with this project is finally complete and has been an overwhelming success. Enjoy the photos!
So now I can put some real miles on the velo when I go cruising and enjoy the ride along the way. This was my goal from the start and now with the help of the little Ridekick trailer it has made it all possible. I think my mission with this project is finally complete and has been an overwhelming success. Enjoy the photos!
Loved this build log. Thanks for sharing it. Can't wait to see what's next!
ReplyDeleteFabulous job! Very impressed.
ReplyDeleteYou understand your projects stand out of the crowd. There is something unique about them. It seems to me all of them are brilliant. Best Trailer Hitch Locks in 2018
ReplyDelete