In my last post I started work on an update of an old design of a gyrocopter kite that was made in the 1960's. Today I will show you another couple of steps in the process of building the Gyrokite. These being the tail section and the main rotors.
The tail section of the gyro is made out of fiberglass which looks complicated to make but when broken down to simple steps is very easy to build.
I started first with an inch and half block of blue styrofoam nine inches wide and six inches long. This is the exact same stuff that you put into your house to insulate it from the cold and can be bought at your local home supply store...aka Lowes, Menards, etc. The block is cut on both sides at a 45 degree angle and then the top edges are rounded off using sandpaper.
Next four layers of 8 oz. fiberglass cloth and resin are applied to the surface of the block making sure that at least four inches of the block are covered with uniform smooth layers. This will make the actual surface of the tail section.
After the fiberglass has cured over night the block is cut using a band saw. The three inch wide middle section is what I was after and the rest of the material can be scrapped.
I then did some additional marking on the newly cut block to get the outline of the tail section that will be cut next again using the band saw.
Here the tail section is starting to take shape after the cutting.
Using a hand held "hotwire" tool I started removing the unneeded styrofoam from the fiberglass tail section. For those you who do not know what a hotwire is check out this site for styrofoam cutting tools that I use in my shop from The Hotwire Foam Factory.
In this photo is the tail section just after I've completely removed all of the styrofoam.
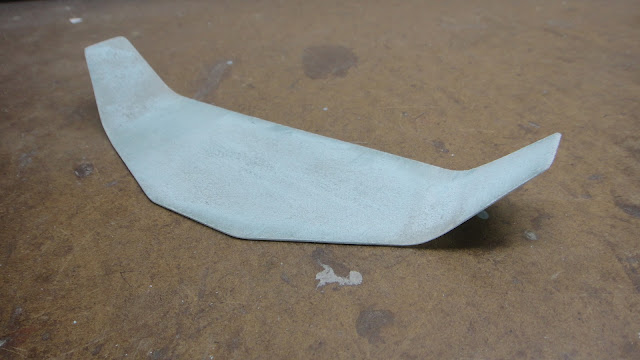
Now with the tail section completely sanded it is ready for priming and more sanding before the final paint is applied. This tail section will be attached to the underside of the fuselage of the Gyrokite with mounting hardware.
The main rotor blades are cut out of 1/8th inch bass wood. These parts I found at my local hobby store. Each strip is 1 1/2 inches wide and 18 inches long. The tips have been rounded along with all edges to give a smooth shape and appearance.
Here is the mounting hardware that I used for the main rotors to be attached to the center hubs. Notice how small everything is compared to the dime laying on the table. The hardware is 2.5 mm machine screws, nuts, and washers.
In this photo the rotor assemblies have been put together after the rotor blades have been painted white with dual striped red tips. The blades at this point now are a little over three feet long.
This is a good close up shot of the center hubs that I printed on the Makerbot 3D printer. This took a little time to figure out the correct angle and pitch of the blades when I was designing them. Also the two rotors are mirror images of one another. There is a left and right blade so that when the rotors are spinning they will rotate opposite of one another when the gyro is flying.
So that's about it for today. Tomorrow I'll be posting the making of the Makerbot parts that I designed and printed for the internal assembly pieces and the landing skids for the Gyrokite. I still am working on the fuselage to make it uniform, strong, and ready for final fit and paint. I will document that process as I go along and pass it on to you when I have more to show you. Have a good day in your workshop!


This comment has been removed by a blog administrator.
ReplyDelete