Friday, March 27, 2015

Dr. Who Tardis Plans Available Now At Reduced Price!


Attention all Dr. Who Fans!  The British Police Call Box plans that have been available here on the blog have been reduced in price by 40%.  I have decided to bring the price down from $25.00 to just $15.00 for the complete set of plans to this great project.  If you ever wanted to build a "Tardis" and didn't know where to start then you've come to the right place. These plans are very complete and detailed with over 70 professionally prepared  drawings, 60 illustrations and 14 assembly drawings to show you step by step how to build your very own full sized British police call box (Tardis). 
  All the dimensions for the project are in feet and inches so you won't have to learn the metric system to build it.  To see a complete video review of what is in the build manual check out the video below.  The video was shot some time ago and it states that the plans can be downloaded from another site.  This has been changed to make it simpler for you to order plans right here on this blog.  Go to the upper right hand side of the home page and select the plans link and you will be able to place your order for this project or any number of other projects listed there that you may be interested in. 


These plans have a complete materials list to show you what you will need to start building your very own Tardis. Now is you chance to own a piece of TV memorabilia that will be strong, sturdy and last for years.  Also I have to mention that this project is especially designed so that it can be assembled and disassembled by just two people. It can be taken apart in sections, transported and reassembled to a new location if the need should arise.  A nice feature to be sure that will come in handy if and when you ever have to move the Tardis.  So get a set of plans now and start building!


Monday, March 23, 2015

Teardrop Trailer Holy Grail Project

For a great many years I have been playing around with the idea of building a teardrop camping trailer.  My design for a teardrop has evolved over the years and has been sitting either in model form on my desk or in illustrations that I've created using Blender 3D.  I would work on the design from time to time and then let it sit idle as a lot of projects do that have to wait for either the right time, place or money to even start such a huge project. 
  I woke up the other morning and had a flash of inspiration concerning this long planned project that I pulled out of mothballs once again and have been working on it.  To show you what I have in mind I will have to let you see some of my earlier work and plans for this project to get you up to speed as to where I am at today.


Here are two early computer models of the trailer that I have planned.  These models were created in Blender 3D software which I am a big fan and as you can see does a great job of rendering something that looks close to a photograph.  This early version of the trailer used all wood construction. The trailer that I have planned is larger than a conventional teardrop as it sits on a 5' X 10' trailer chassis to allow much more room in the forward sleeping cabin.  My design is a cross between an all aluminum"Airstream" trailer and a teardrop.  A normal teardrop has flat sides and no radius on the edges as shown here.  This design I think gives it a much more pleasing smooth shape.  The problem with it being constructed in wood as you see here is getting all the radius parts made and assembled.  That just for starters kind of makes this type of build a real problem.  Not that it could not be done just would be a lot of work and then you'd still have to figure out how to skin the body.


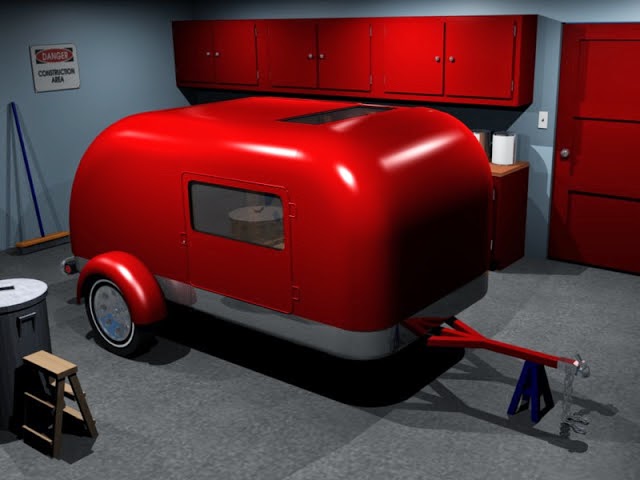
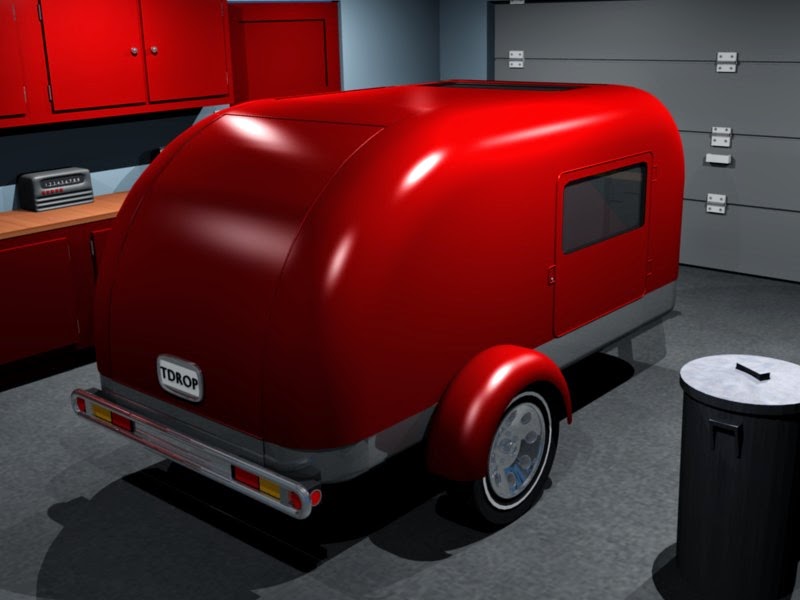
These next two images give you a much better idea of how the teardrop trailer would look once a skin was assembled on to the inner framework.  A very slick looking trailer to say the least.  This earlier version is very close to the idea that I have had in my head for the last 15 or 20 years.  So it was a good start.  At the time these computer models were created I did not know how to work with fiberglass composite construction.  This changed after some training and several projects that have followed such as my motorcycle cargo trailer, a three section kayak, and the velomobile project. (See earlier post about the construction of these fiberglass composite projects.)
  With all that I have learned from these projects and other smaller ones it finally hit me that the teardrop trailer could be built the same way.  So the project idea is still alive and I am still planning on it's construction some time in the future.  I have the space, and the time.  Now just to work out the budget and I will have the three key steps in place to finally build what I call "The Teardrop Trailer Holy Grail Project."


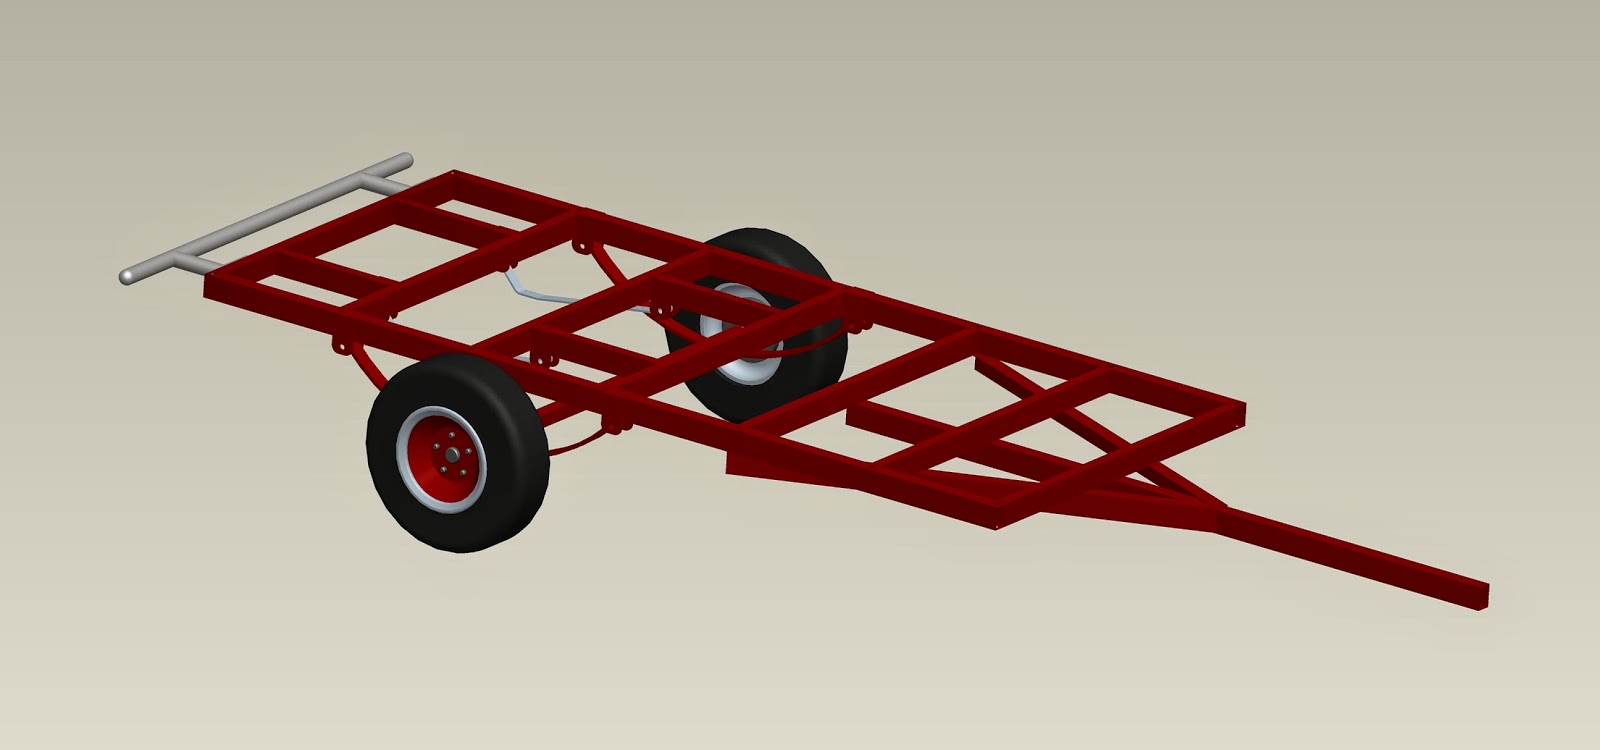
The project would start off with a 5' X 10' steel frame.  This I can buy already built.  Why reinvent the wheel if you can get it already made?  Makes things a lot simpler if this is sitting in the garage ready to be built upon and I don't have to worry about it being strong enough or that it may possibly track down the road incorrectly.


Next comes the fiberglass composite floor and fender assembly.  This is exactly how the body for my motorcycle cargo trailer was built only much larger.  The small squares in the floor of the trailer image you see above are the mounting points for the body to be attached to the frame. These mounting points are a hard mount that are glassed into the fiberglass/foam composite bed.  This mount makes a solid strong mount to bolt the floor of the body to the frame once everything has been lined up for installation.


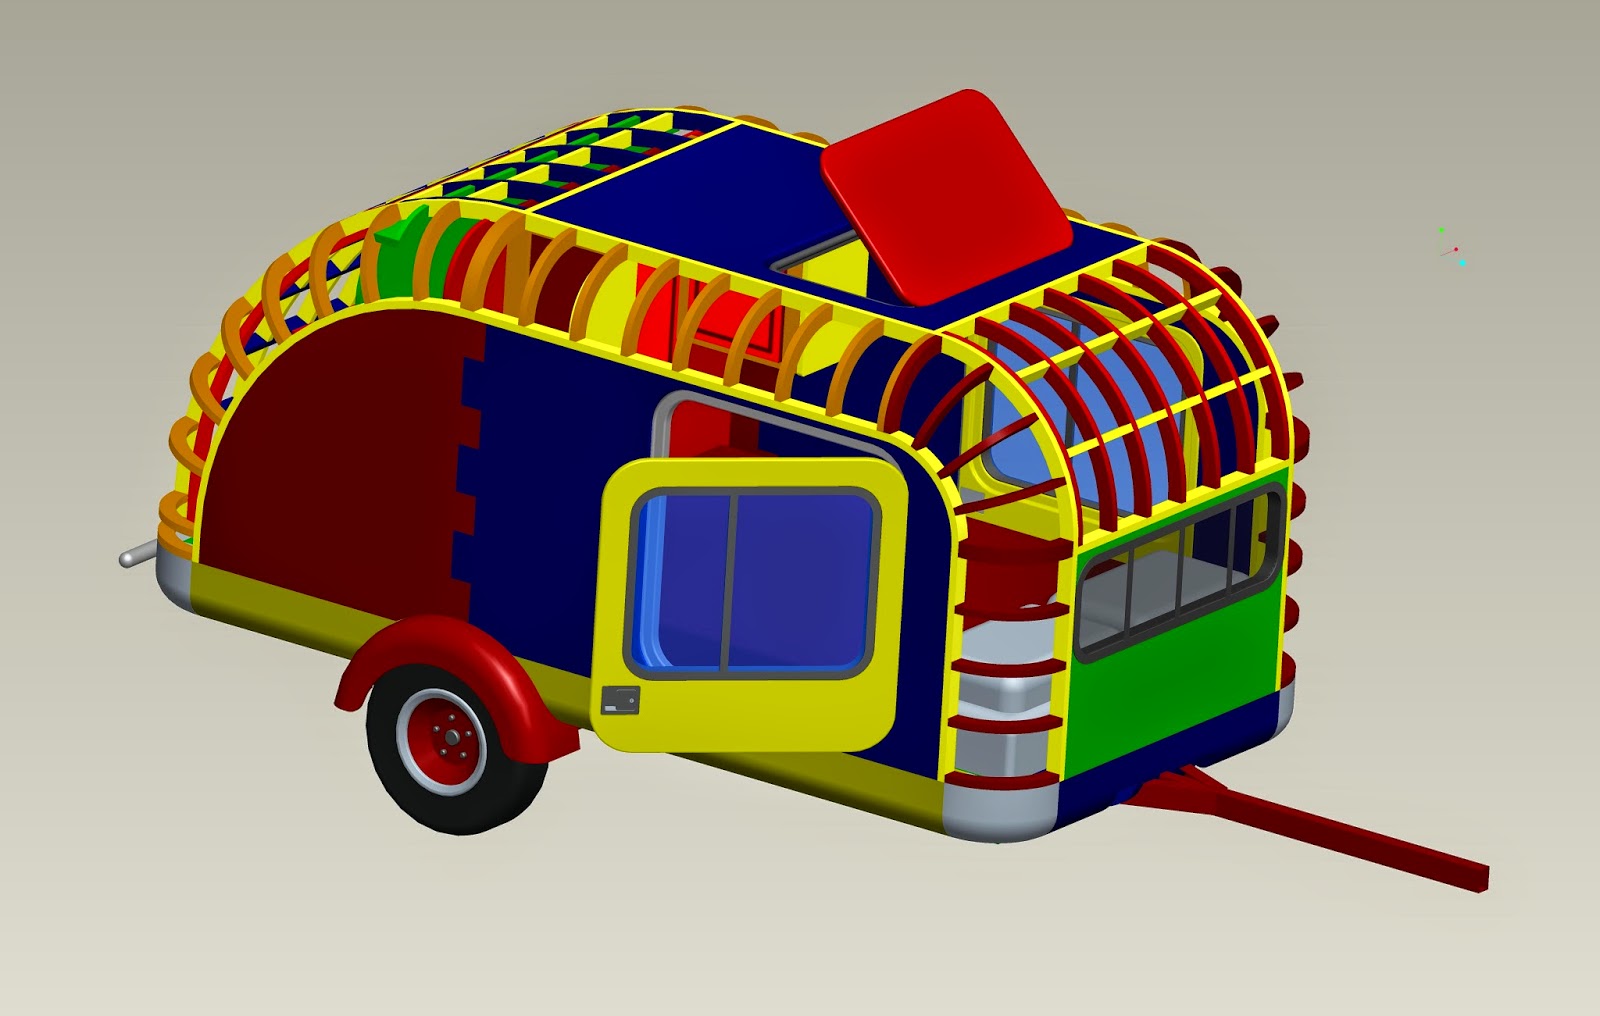
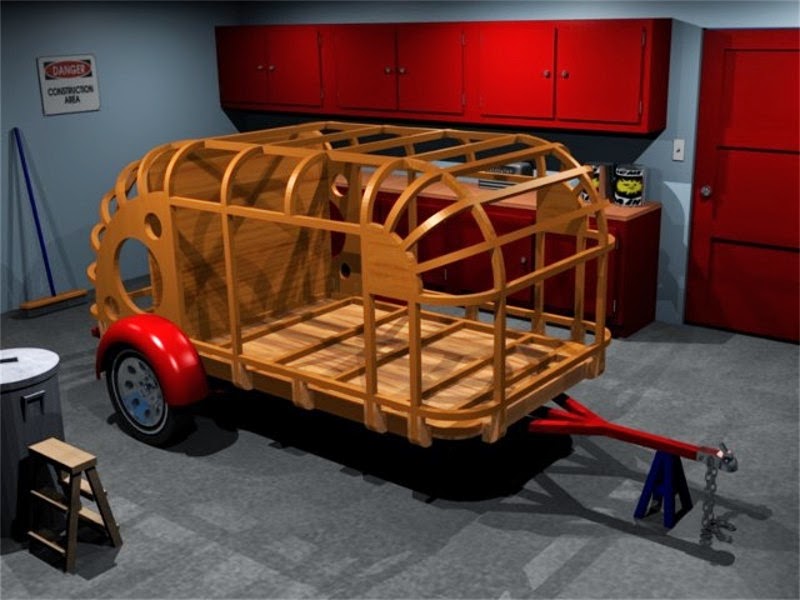
Next the body is fiberglassed on to the floor of the trailer.  The curved pieces that make up the radius edges of the trailer along with all the other multi-colored parts you see in the above image are made from styrofoam that has been covered with fiberglass. Very light weight and strong once assembled.  The curved pieces are small enough to be cut using my CNC machine so to make 46 of the needed parts would be easy work and all of them would be exactly the same shape and size for the project. 


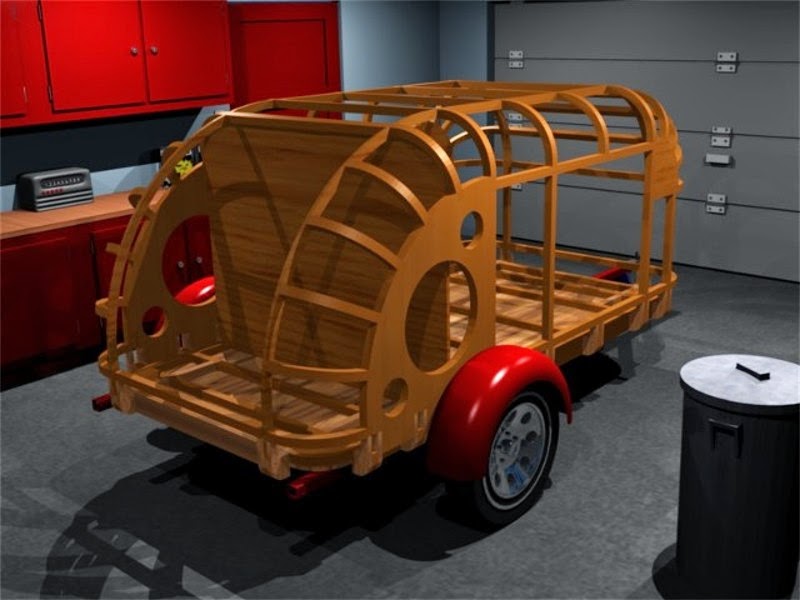
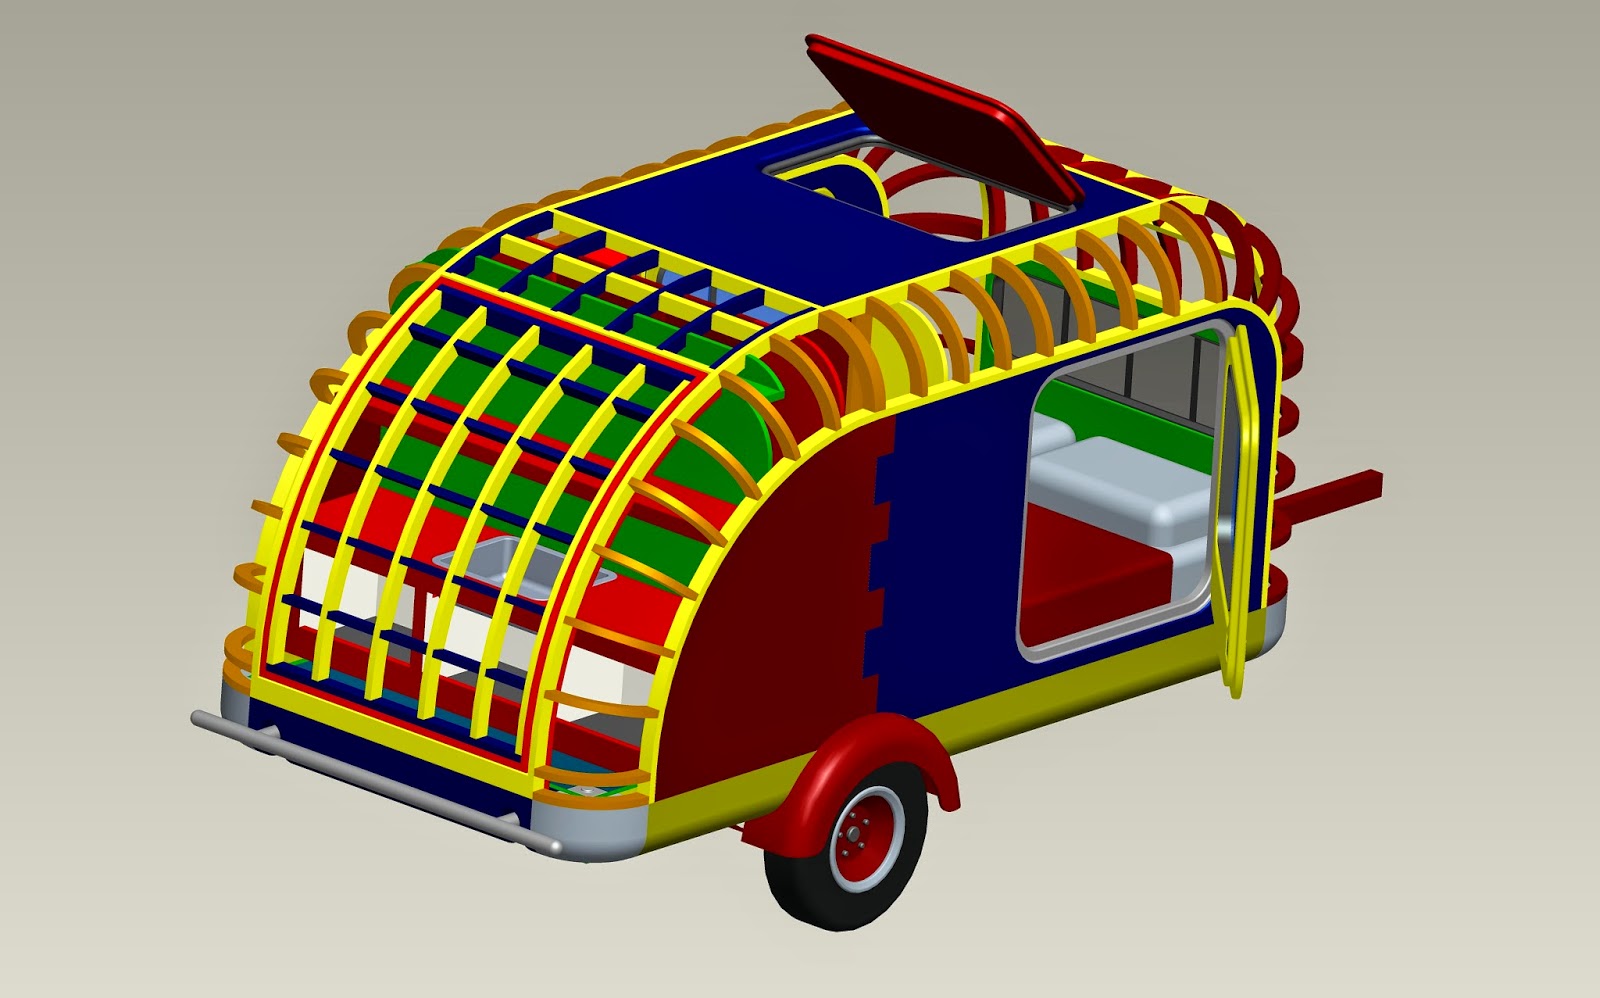
In this image you can see that the rear hatch has been removed and the kitchen cabinets and sink have been installed. Also in the image the bed has been installed into the forward sleeping area.


These two images give you a better idea of the overall shape of the body of the teardrop camping trailer. Once all of the framework of the trailer has been constructed the body is skinned with  1/4" thick strips of styrofoam much like a cedar strip canoe would be built and the same process that I used to make the body for my velomobile project.  The body is then fiberglassed on the inside of the trailer, then sanded smooth on the outside and glassed once again.  This makes a very lightweight and strong body that can then be sanded smooth and painted just as you would any vehicle. 
  An interior for the trailer is still in the planning stages as is much of this project.  But with the answer to the problem of building the radius edges on the body it has come just that much closer to becoming a reality some day.  


Another feature that I thought would be a big plus in the planning of this project is to have a built in water tank for the kitchen in the rear of the trailer.  This would hold approximately 20 gallons of fresh water for cooking and cleaning.  Along with the kitchen and the rest of the trailer for that matter would be a full electrical system for lighting and appliances.  With the trailer being as large as it is there is even room for a closet to store clothing and items in the sleeping compartment.  A nice feature to be sure.
  The trailer would stand 6'4" tall and be 73" wide at the fenders.  Overall length from the hitch to the rear bumper would be just a shade over 15' long.   The sleeping compartment would be 5'2" x 9.5' in size with a ceiling height  of 50" without the mattress.  With these measurements it gives the sleeping compartment much more room than a standard teardrop trailer would have. 
  Lots of planning still needs to be done to even start this project.  Right now my guess is that this project would take close to two years to complete at a cost of near $5000. I have the time and the space as I've said.  I just have to come up with the funding for this along with a vehicle that can tow it.  It would be very light weight in the scheme of things but is still way to large to tow with my Mini Cooper.  My Mini has the power but it still would be scary as you could not see around this trailer when you towed it.  Not a good idea for sure.  
  I will continue refining the project from time to time and when I do finally set the starting date as to it's construction I will be sure to let you know.  In the meantime I thought I'd wet you appetite with this little beauty.  If you have any suggestions or ideas that I should include in this project I would be more than happy to hear from you.  Have a good one!

Monday, March 16, 2015

Indian Motorcycle Display...... Worth A Thousand Words!

I am very pleased to show you today the completion of another project that I started several weeks ago.  This being my 1912 Indian motorcycle display that I have been putting together for my workshop.  I put the finishing touches on the project late this afternoon and I am thrilled how it all turned out.  


Here is the finished project that will really brighten up my workshop.  The tubing for the framework is standard 1/2 inch PVC conduit that I removed all the markings off of the tubing using acetone. This worked out so well that I have eliminated the idea of painting the tubing red.  With the gray in the illustration of the Indian's engine it seems to tie in nicely with the entire look of the display by leaving it gray with the red 3D printed mounting parts.  So it saves me a bunch more work and I can call it done.


This photo is of the corner fittings that I designed and 3D printed for the display framework.  The black cylindrical plugs slid easily into the red fittings so that the PVC tubing could be plugged into each corner of the frame.  The black plugs were simply glued in place using plastic modeling glue. 


These three assemblies are the hangers for the frame which again were designed so the a standard "Eye" bolt could be mounted to the upper portion of the printed parts.  This eye bolt is held in place with an upper external and lower internal nut.  I put a hex cavity in the upper internal portion of the parts so the nut would not spin when the eye bolt was mounted to the base parts.  The middle assembly above is slightly different than the two out assemblies as this required a vertical PVC tube mount to tie it into the bottom tube of the framework.  This eliminated the sagging of the cross tubes when it would be hung up for display. Worked out rather nicely when I put it together in the final assembly.


In each of the corners of the framework are these triangular 1/4 inch thick plexiglass shapes.  These I cut out using my CNC machine and a milling bit for plastic.  Did a nice job on these parts and only took about three minutes to make each one.  The slot in the center of the part is so the corner of the Indian motorcycle banner could be pulled tight using a mounting clip assembly.


Here are the clips that I found at my local home and builders store.  These are called tarp grabbers and the look and function of these little guys were perfect for this project.  Four of them only cost me $3.00.  A good price so I snapped them up as soon as I found them.


These odd little bits I designed for the tarp grabbers so that everything could be tied into the corner plexiglass parts.  The first ones I made were similar to what you see here but without the dimple on the side of the base.  This turned out to cause an interference problem with the tarp grabber so these were designed to take care of that little problem.  


Here's a good shot of one of the corners of the framework with all of the components assembled and in place.  The tarp grabber is mounted to the small cylinder with the dimple that in turn is mounted to the plexiglass triangular piece.  The plexiglass is mounted to the corner tube mounts and also to the two outer mounts.  All of this is bolted together using 3/16 inch button head bolts and nuts that are countersunk into each red 3D printed part.  The entire assembly is put together using only a couple of allen wrenchs and a 1/4 inch wrench for the bolt that holds the tarp grabber to the plexiglass part.  I like the look and it was very simple to put together once I had all the holes drilled for the tubing.  This by the way was accomplished by using the 3D printed parts as guides to center the drill holes.  It all worked out very well so it was another great day in the shop.


The overall size of the display is 36" x 76".  This post has the title "Worth a thousand words".  I hope you agree with my sentiment on how this project turned out.  No matter what, this display will really brighten up the rather bland white wall it now covers.  Enjoy the photos.

Friday, March 6, 2015

Another Step Closer For Indian Motorcycle Display

Work on my Indian motorcycle display has been progressing nicely with refinements being made to the frame design.  I originally planned on using a wooden framework to hold the banner that is now on order.  While this would be an easy way to accomplish this part of the project I have had some second thoughts about using 1 X 4 lumber for the framework.  The wood frame would look fine I am sure but I wanted something a bit cleaner looking and lighter to hang on the wall.  The cost would not be a real big factor but the look was not exactly what I have in mind.  I thought possibly that I would use copper tubing.  This idea was scrapped because copper is expensive and still a bit heavier than I wanted for the framework.  Instead I have decided to use PVC tubing.  But for the connectors for the corners of the framework the idea of using plumbing fittings just would ruin the entire look of the display.  Instead I will make my own fittings for the banner and frame corners using my 3D printer and my CNC machine.  Here is what I have in mind.


The framework will have smooth cornered fittings at the corners so I do not end up with having that plumbing look that I spoke of earlier.  There will need to be fourteen 3D printed fittings for the framework that will hold the assembly together.  Along with these fittings will be four 1/4 inch Plexiglass triangular plates that will be mounted into each corner to keep everything aligned and hold the banner with a special set of corner clips that I found at my local home and builders store. 


Here's a good view of what I have in mind for the framework corners.  This is the lower right corner with all the hardware in place.  The center circular part with the tab on it is the special little clamp that is attached to each corner of the banner.  This clamp holds the banner tight and with another special little 3D printed attachment to the tab allows it to be bolted through the center slot in the Plexiglass.  This slot makes it possible for the banner to be adjusted so it can be pulled tight in all four corners. The Plexiglass is held in place with two outer tube clamps and a center corner bolt to the 3D printed "L" mount.  The outer tube clamps are also bolted to the outer tubes to hold the framework securely together.  


In this view of the upper right corner of the framework the only difference to the assembly is the upper mount for the top tube and Plexiglass along with the eye bolt that is attached to it.  The eye bolt attaches to a mounting chain that will be hooked into the ceiling so the display can be hung up when the assembly is completed. With the PVC tubing and the 3D printed parts the cost for the project has been reduced once again along with the weight of the entire assembly.  Once I have everything put together I will disassemble the assembly and then prime and paint the tubing a bright red to match the what you see here.  After everything has dried and looks the way I want it will be put back together again. 
  My original budget for this project was set at $100.  The way it looks now it will be closer to half that cost!  (Puts a smile on my face to be sure.)  Always a good thing to have a project come way under budget.  I'll have to double check my calculations for these plans once the banner is in my hands so that everything will mount up  correctly as you see here without any problems. After I get all the materials together I will post more about this fun project and keep you up to date on it's construction and completion.

Wednesday, March 4, 2015

Indian Motorcycle Workshop Display Progress

I managed to cross a couple of "T's" and dot a few "I's" with my Indian Motorcycle display project that I posted about earlier.  I contacted my supplier for the decal that I wanted for this large display today.  After discussing the project and finding out that the display would be three feet by six feet overall this idea started to progress until I found out the price for the decal.  Just the cost for this portion of the project would have blown the budget before I even got it off the ground.  I didn't want to spend more the $100 for the display and with the cost of the decal and materials for the panel to mount it on the numbers looked to be triple of what I wanted to spend.
 So I have shifted gears with the project and decided to have a banner made instead for the display. My supplier said that he could do this as well at a cost well over the $100 limit also.  I understood that my supplier is a business man that was trying to make a living and I still wanted to stay within my budget.  So with a thanks but no thanks I refused his price and decided to look elsewhere for my banner. 
  I succeeded when I went online and tracked down my supplier for my business cards for the blog.  They also make more things than business cards.  Labels, coffee mugs, magnetic decals for you car and of course banners and a lot of other interesting things.  This company by the way is the well know business supply company Vista Print.  They advertise on TV all the time and they are good at what they do and offer at a very reasonable price. They have done good work for me before so I thought I would see what they could do for me now.  
  I went on to their website and started plugging in the information needed to create a banner along with the artwork of the Indian motorcycle. After a couple of minutes of tweaking the wording for the 2.5 foot by 6 foot banner and getting the right layout for this project I was thrilled to place the order for only $37.14.  Well within my $100 budget.  Here is what the new banner will look like. 


The banner will have eyelets in the corners so that I can hang it up nice and tight.  I plan on making a wooden framework that will wrap around the perimeter of the display and then have bungee straps connected to the eyelets and mounts in each corner of the frame.  Over all size of the frame will have to be three foot by six and a half foot in size.  So the next step in the project is to get this framework designed and built so that it is strong and stiff enough to keep it square and true while it is being hung on the wall.   The framework I suspect will have to be made up of 1 x 4's with mounting blocks in the corners.  These will be hidden mostly by the banner that will be pulled tight within the frame.  The frame could be either painted white or strained and varnished.  I will have to see once I get everything put together before I decide which way I want to go.  I should receive the new banner by next week.  This looks like this will be another fun build and will be a great addition to the workshop when it is completed.  Stay tuned for further developments on this and other great projects here at the shop.  Have a good one!