
As most of you already know I am a big velomobile enthusiast and have built my own design that has been posted about here a lot over the past few years. This morning I completed a project that has been on my mind for quite some time. To give you a little background on the idea for this project I have to point you to the following site.
On this site is a link to a book that was put out a number of years ago. The book is a documentary of a group of fifty-five velomobile drivers who crossed the United States in 28 days with their velomobiles. From Portland Oregon to Washington DC.....over 3200 miles. On the site is the following image that has stuck in my head for all of this time and led me to the creation of the project that I completed today.

This image has stuck in my head for years and I always thought that it would make a great poster. Sadly none was ever produced. I could not even find out who had created the artwork and so the project never got off the ground until I decided to try and duplicate the image myself and make my own poster. I wanted the poster to be large enough to hang in my garage.

I measured the Indian motorcycle poster that I have in my workshop which is six feet wide and 30 inches tall. This was the size I had in mind for this project. So the velomobile poster project was born.

In order to create the large poster I used the same company that had made my Indian motorcycle poster....Vistaprint. That was the easy part. But I knew that I could not use the original Roll Over America image as it simply was not large enough to get a perfectly clear image once the poster had been created. Being a smaller format to blow it up bigger would create a blurry poster. So I needed to duplicate the poster from scratch. You can see the start of my poster above along with the original image below it.

Here is my final poster that I created using the original as a guide. It is not a perfect copy by any means but it is a good knock-off so it works for me. The lettering was the easy part of creating my copy but making all of the velomobiles took me several long days to get the colors and lighting the way I wanted them. Again the best I can say is that it's a pretty good knock-off. Once I had my version of the poster completed I sent it off to Vistaprint to get it made.

The original frame for the Indian motorcycle poster had a rectangular frame similar to the one that I have pictured above. The original computer files were lost some time back so I had to try and make the framework again from scratch in Fusion 360. This would have worked out fine but I decided to change this a bit with this new poster.

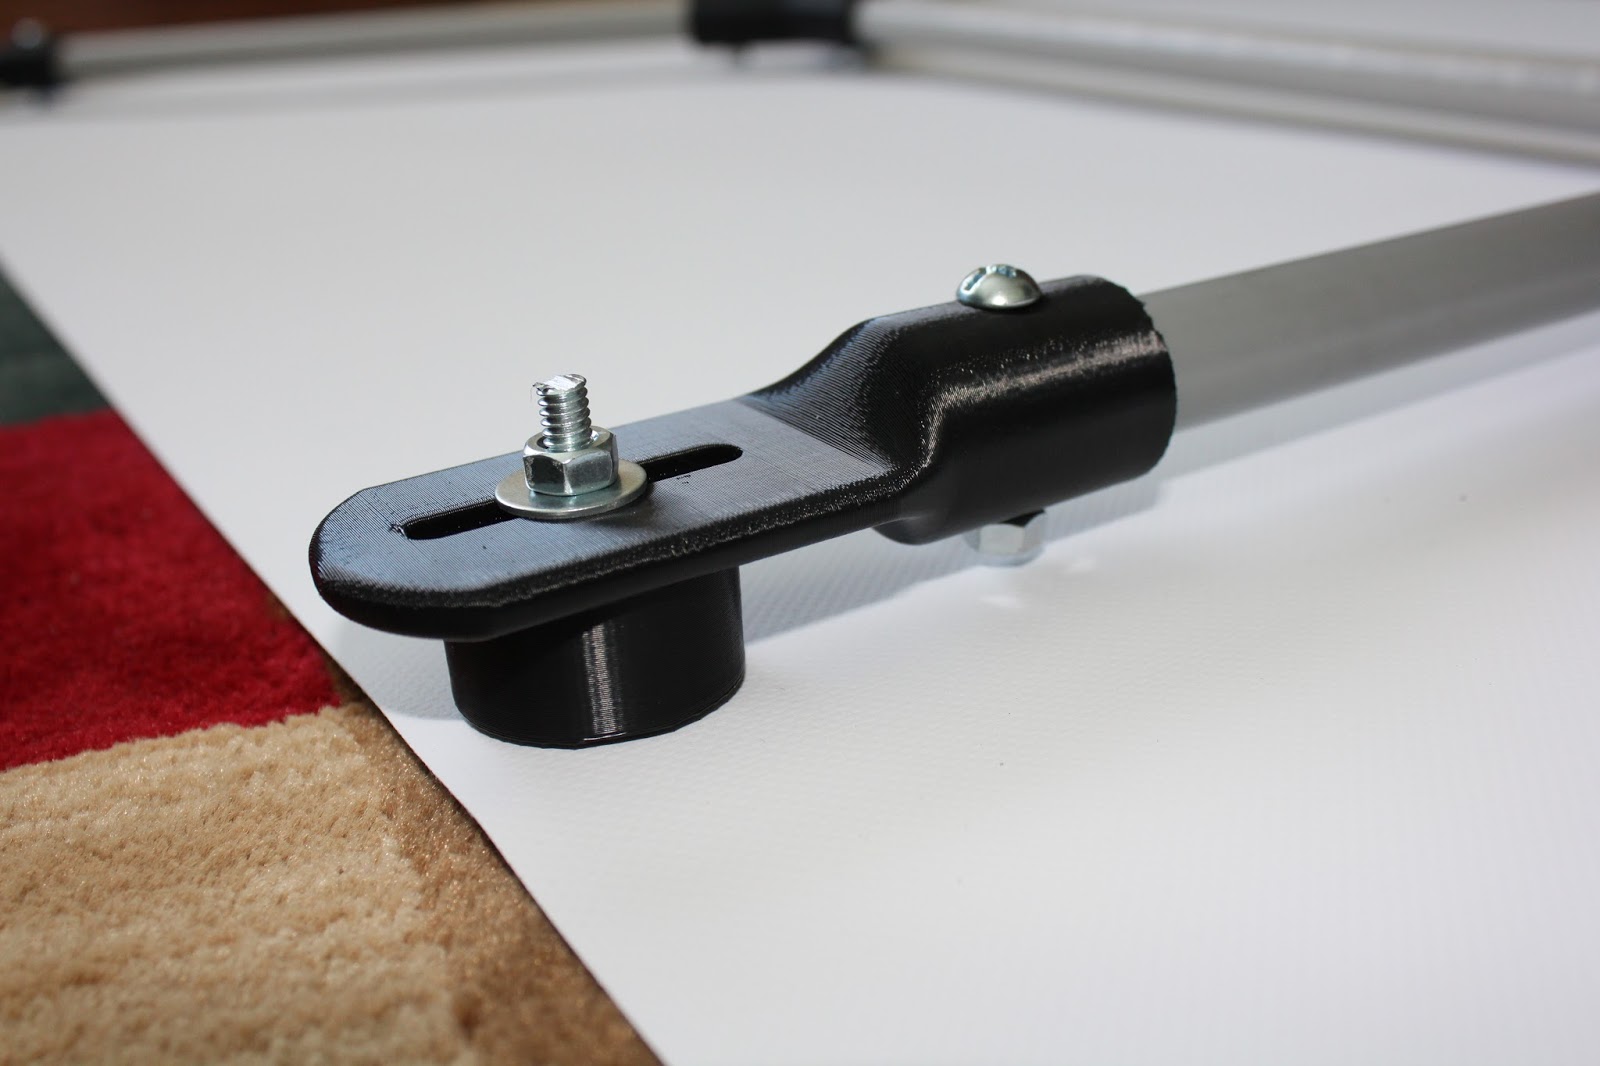
Rather than make the square frame over again I came up with this new design that used fewer parts and ended up being lighter in the process. All of the components except the tubing for the new frame were then 3D printed for the assembly.


Here are the three main types of fittings that I 3D printed for the new frame. Each took some time to 3D print as I suspected but they turned out better than I had hoped. Nice clean prints and very strong for this project.

To get the tubing drilled correctly for the new framework I 3D printed a drill guide for the ends of the tubes. The drill guide is flat on the bottom to keep the drill hole lined up perpendicular to the PVC tubing and create a perfectly centered hole.

An additional drill guide is slid on to the opposite end of the tubing to keep it parallel with the table and easier to hold the setup while I was drilling the tubing.


The hole in the drill guide makes alignment of the drill bit to make the hole very easy and as you can see it makes a perfectly centered hole exactly where I need it to mount all of the parts for the assembly. Each hole was exactly 3/4" from the end of the tubing on both ends for all parts.

After I had the assembly for the frame put together I laid it on top of the back side of the poster to check the alignment of the grommet holes with the mounting frame. All of the mounts lined up perfectly and the framework slide together easily.
A cylindrical spacer was 3D printed for all of the arms that keeps the framework separated from the poster.

On the upper mounts I attached metal tabs that would hold the small chains that were used to mount the poster framework to the wall.


To mount the poster to the wall all I needed to do was install three "I" bolts and add the small chains with hooks on both ends. It brightens up my garage in a big way. I thought the poster looked big in my house but once I had it mounted in the garage it looks much smaller. Either way I think it looks great with my velomobile parked under it. Also the framework to hang the poster is almost completely hidden behind the poster which gives it a nice clean look. Vistaprint did a great job of making the velomobile poster out of quality heavy vinyl so hats off to them once again as well.
Another good day in the workshop and another project I can scratch off my bucket list.
Another good day in the workshop and another project I can scratch off my bucket list.
No comments:
Post a Comment