Some time back I put together a project that I had in my mind for a long long time. It has been on my refrigerator for just about as long and I am finally updating it to make it that much better. As with most anyone who works on projects the second or even the third version always turns out better than the first go around. This is the case with this project.
I always liked the idea of having a calendar that I didn't have to throw away after only one year of use. This is my original design that I put together. It was made using PVC piping, foam core, and some decals that I printed using my computer and held on the fridge using magnetic strips. The only problem with the design was that parts were a lot of work to make and are a little bit heavier than I liked. I had no way of making the parts to display what month it was either. So back to the drawing board for version two.
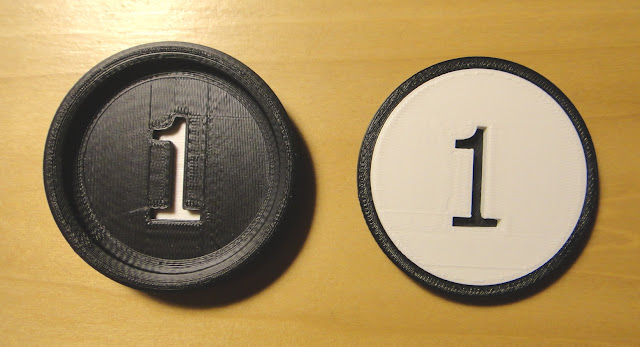
I started with my Makerbot 3D printer once again with the version on the left. Same idea as the first version but I was not impressed with the part being mostly black. So I reversed the printing of the part and also made it thinner. Which of course made it lighter. The white looks a lot better. It was a start.
This next version I scrapped the idea of just black and white and also went with a font that would make the number 6, 8, 9, or 0 work out well as the individual numbers were now printed on one white part and inserted into the red part. Again the idea of having all the parts made circular did not thrill me much anymore so on to the new version on the right. I changed the part to what you see here with the inner portion of the red frame being painted black. This made the numbers stand out even more and would be simple to construct. The parts fit tight without having to glue them together. Always a plus.
With a few more tweaks and the help of Blender 3D graphics this is what the new design will look like once I get all the parts made using my 3D printer. Each number part and day of the week will be 2 inches wide and 1 1/2 inches high. The month (in blue) will be three inches wide and 1 1/2 inches high. As before all parts will have a magnetic strip on the back so that it can easily be used on my fridge once again. This way each month the calender can be easily changed to show whatever month it is.
The only other step will be to make a container to hold all the parts for storage when the calender is not on my fridge along with possibly special parts to show holidays when it is. A heart for Valentines day or a Christmas tree for Christmas for example. I'll have to see what I can make up that will work on the 3D printer. No matter what this new design will look a lot nicer on my fridge and people will stop asking me why the month is not displayed with everything else. Another plus with this project is that I figured that the total cost for the calender will be around $20 to make on my 3D printer. A good deal for sure.
I'll post new photos of this project once I get further along with it to let you see how it all turns out.


No comments:
Post a Comment