
This week spring has sprung in a big way here in the Midwest and so like everyone else at this time of year there are a lot of chores that need to be done and some are fun and not so fun. I had to mow my lawn today for the first time this season which looked more like a jungle before I started. This was not so much fun but at least I have a small yard so it's not as bad as it sounds. I also got my motorcycle out of winter storage and put my carefully charged battery in my Honda Goldwing and off to the motorcycle shop for a spring check-up, oil change and new tires. This was the fun part. At least until I see the bill for the work that needs to be done. These two chores along with other spring activities have slowed my progress a bit in the workshop.
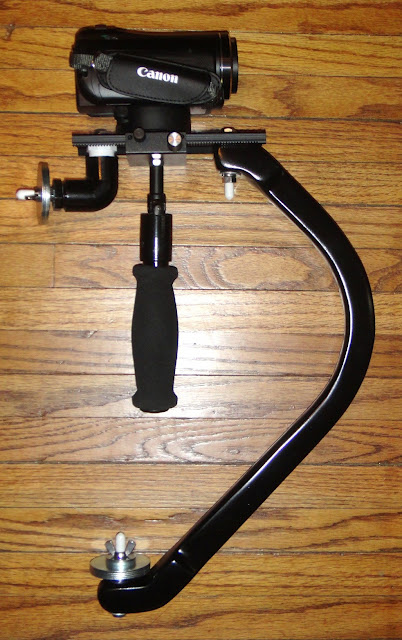
The first steadicam design.
So to the point here I have been working on a new steadicam design / build. If you have been following my blog your next question I am sure is "Why build another steadicam?" I have had a lot of email about my last build of the fiberglass steadicam from a little while back. The steadicam turned out better than I had hoped and had a great response about the design. The reason I am building another steadicam is because I sold the first steadicam to a filmmaker in Barcelona Spain for a good price and so this design was born from what I learned the first time around. The drawback with the first design was that it took roughly eight hours to build the arm out of wood and fiberglass. Glass and let it dry, glass some more and let it dry. Sand and prime, and sand and prime. Then on to paint over and over. So you can see what it took to build. My new design is a lot more streamlined with less work to build. Here are some Blender 3D graphics of the new design.


These first two images of of the new design uses polished aluminum. A great look to be sure but with drawbacks that I will explain in a minute. The arm is identical to the original design in shape with the addition of a double arm and spacers between them. I love the look of the polished aluminum and have yet to decide if this is the way I will go on the final build. The aluminum is 1/4 inch thick and being this thick it will be plenty stiff for the arm but with that thickness also comes the weight. The volume per arm is 4.63 cubic inches and with aluminum weighing 1.56 ounces per cubic inch comes to 14.44 oz. for both arms not including spacers , and hardware to mount it. Not sure if I want the arm to be that heavy. It's a trade off to be sure.
I've also played around with the idea of building the arms for the steadicam out of carbon fiber. This would be an outsatnding look for the steadicam, be super strong, and very light weight. This all sounded good until I checked out the price for 1/4 inch thick carbon fiber panel bigger enough to make the arms out of. A piece 12 x 18 inches comes to a whopping $175. OUCH! Even if I only go with 1/8 inch thick carbon fiber parts it will still cost way more than I want to spend on this project. So that idea was scrapped early on.


These two images show the same design but using polycarbonate plastic instead of aluminum. This plastic is the same material used in bullet proof windows. It would make the arm a lot lighter than aluminum and much cheaper than carbon fiber. Not as strong as the other two materials of course but still looks great and is stronger than normal plexiglass just in case of an accident where it might get dropped. (Heaven forbid!). I have the polycarbonate arms already cut out on the CNC machine in the workshop but until I get the spacer material I will wait for further photos here as it will be simpler to show and explain the new assembly.
Every thing else on the steadicam is the same as my original design and should only take a couple of hours to assemble. A big plus compared to eight hours of fiberglassing, sanding, and painting.
I'll post more photos of this build once the last of the parts for the steadicam show up in the mail and I get the spacers machined in the workshop. Until then I will be out on my motorcycle enjoying the warm spring weather cruising down some favorite back roads and planning a big motorcycle trip for the summer.
I recently found many useful information in your website especially this blog page. Among the lots of comments on your articles. Thanks for sharing.
ReplyDeleteBest DSLR Steadicam