Tuesday, March 26, 2019

1/6th Scale 3D Printed 1927 Bugatti Type 35 Model Project Part 3

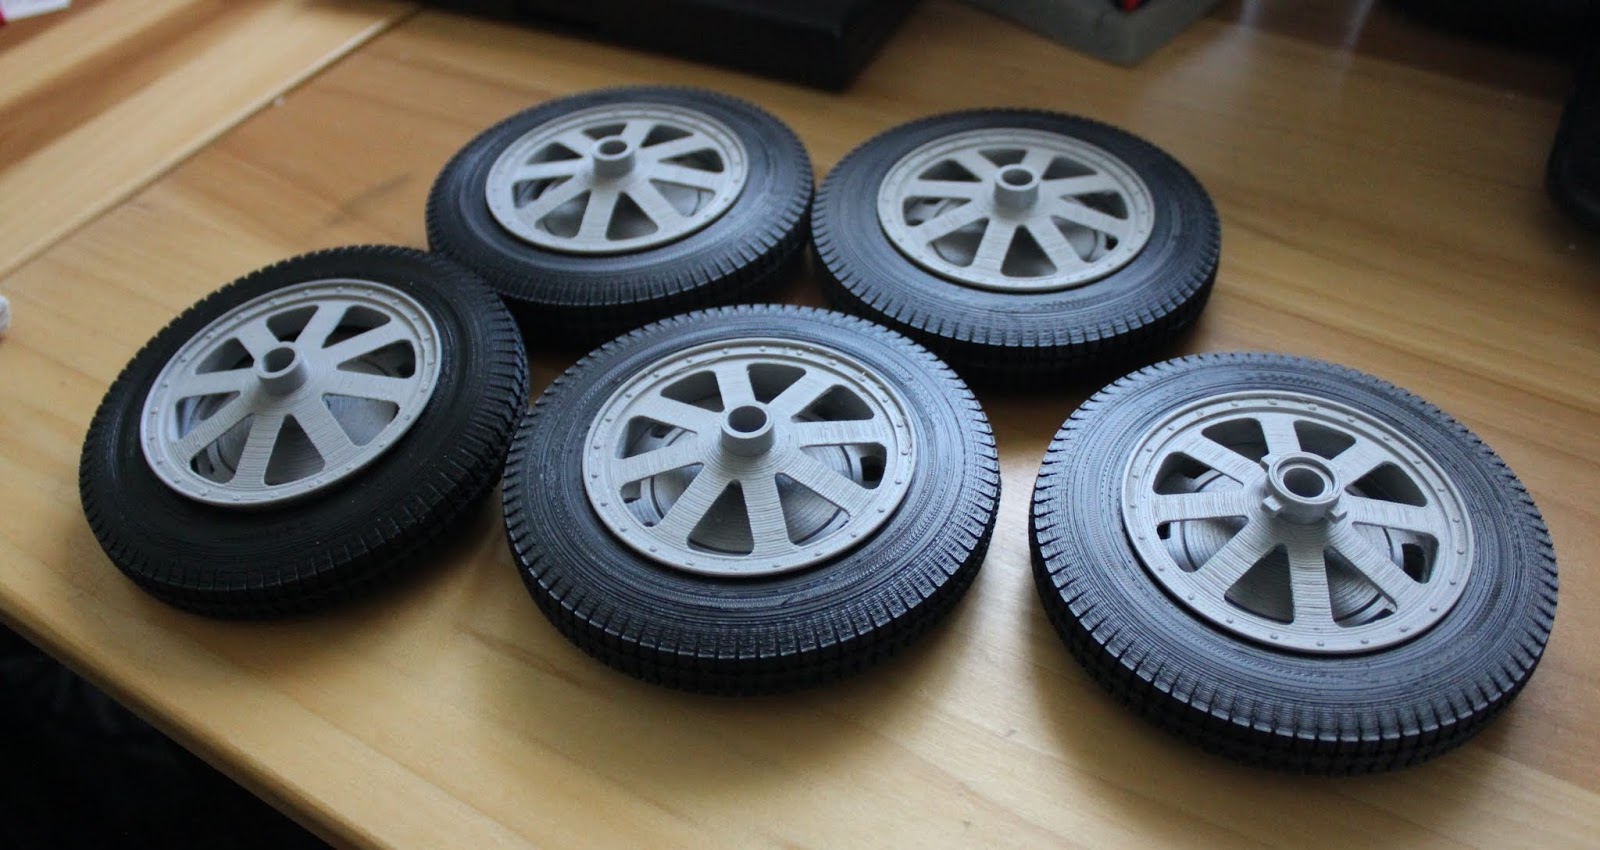
I have been plugging along on the Bugatti project again this past week and am happy to report that I have finished 3D printing all of the wheels and hubs for the model.  This was actually a major part of the 3D printing that needed to be done coming in at 95 hours total for the tires and rims.  With that effort I am rewarded with the knowledge that the model will have wheels that will roll instead of being locked in place.


Each tire other than the spare is made up of all of the components you see pictured above.  Starting from the left and moving right you have the outer rim, the tire, inner rim part one, inner rim part two, and finally the brake cover.  I split up the inner rim into two pieces so that I could get nice clean surfaces on both sides.  These parts were glued together after I 3D printing them.  It worked out very well. 


This is how one of the tires looks on the side facing out.  I like the detail I was able to achieve with the bolt pattern on the outer portion of the rim.  The tire itself turned out very well also. 


Here's a shot of the inside of the same tire showing the brake cover.  The little stem on the right side of the brake cover will be the mounting place for a small lever that is used to make the brakes work in the real car. 


I am happy to have this portion of the model completed only if it is just the tires and rims.  It gets kind of boring making the same parts over and over again.  But all of them turned out very well and will look great on the model once it is completed. 


Here is how the chassis looks at this point in Fusion 360.  It has taken me a good part of the week just to finish up the front suspension and work out all of the parts for the rear setup as well.  Starting to look like a real car so that is good. 


The bell housing at the rear of the car will be an interesting part to put together.  Like the tires I plan on 3D print this into two parts.  This way I get nice detail in that part of the assembly with very little clean-up after it has been 3D printed. 


I needed the rear axle assembly in the model so that I could mount the wheels properly. The axle is held in place by two leaf spring that are mounted on to the tail end of the frame and then face forward to meet up with the rear axle.  Along side the frame are also two radius arms that go from the frame reward to the axle on the outside of the body. 

This setup took me some time to figure out how to design so that I could 3D print the parts to make it all work.  Being as the model is only 1/6th scale some of the parts get pretty small to make so I have to do the best I can to make it all work and look as correct as possible. 


 Here's and underside view of the frame setup showing the front and rear axle layouts. I still have more cross braces that need to be mounted between the two main frame rails but as for as I can see this should not be a big issue to work out for the model. 


I do not plan on making the engine for the model as it will not be seen once the model is completed.  I do want to put in a good detailed version of the cockpit though with of course seats, steering wheel, gauges and the like so I will just have make it as complete as I can when I get to that part of the design.  As for the underside where the engine will be at this point I may just close that portion of the model up. I will again just have to see how difficult it would be to have an engine in the model so this may all change.  

I talked with my brother on and off about the model over the past month or so and we both agreed that if the model was say 1/4 scale a lot more detail could be added to it.  This is a given. But I would find it even more difficult to 3D print such a large model being around three feet long.  If I could then I would make it radio controlled so I could at least play with it in my back yard.  But I am not sure that my 3D printer could make such large parts so at this point it is just a passing thought. 


Finally for this post I wanted to mention the Haynes book "Bugatti Type 35 Owner's Workshop Manual" by Chas Parker.  This book has given me a wealth of information about the Bugatti Type 35 along with many photos that I have not seen online.  Also in the book is the history of Mr. Bugatti himself and many of the drivers that raced this amazing vehicle.  It has helped me greatly in being able to model the Bugatti so that I can 3D print it.  I just hope I will be able to do it justice to the car when I am done.  

So that's about all I have for you this week.  I should be able to start printing parts of the chassis and body in the coming weeks so that the model can start being assembled.  Should be interesting to say the least.  

Tuesday, March 19, 2019

1/6th Scale 3D Printed 1927 Bugatti Type 35 Model Project Part 2

This weeks brings a lot of design progress to this project. With the body panels pretty well done along with the front suspension starting to take shape the hours I put into the design are coming together.


Here's a good view of the Fusion 360 model as of this morning. It is starting to look like a proper Bugatti Type 35 so I am happy for that much.  


I have to keep reminding myself that this will be a model and not an actual car that will be assembled like a real car.  The perfect example of this is the front suspension that you see pictured above. In a real car the front axle and leaf springs are assembled separately and then finally together.  For the model it is much simpler to combine these to assemblies into one single part that will be 3D printed.  

I took great care in modeling the leaf springs.  I want them to look like the real thing in the model rather than just a simple representation of the assembly.  This was not an easy task as it took me a little more than a day to get them modeled as you see in the image above. In the model the leaf springs are only around three inches apart so hopefully all the detail that I have modeled hear will not be lost because of the size of the model when I 3D print it. 


In this view you can see the detail again in the leaf spring along with the front brake assembly and the tie rod connections.  The arm on the right side of the brake drum will be connected to a small cable that would pull the arm rearward when the brakes would be applied.  Hopefully I can get the cable installed in the model using a small piece of wire.  That is the plan anyway.


Here's another view of the front end of the Bugatti with most of the suspension installed along with the steering setup.  In the first image in this post you can see a piece of sheet metal that is in front of the radiator.  I left this part off in this image so that you could see the suspension setup easier. 


Among the other features that I needed for the model was the gas cap pictured above.  This image was created using Fusion 360 CAD software.  Looks really close to the real thing in this image. Nice but I only wish that I could make this part as you see it here.  The part in the completed model will be quite small and I will not be able to smooth it out as perfectly as you see here.  That would take an SLA 3D printer and then have to be painted chrome on top of it all.  I will have to settle for my FDM 3D printer and leave it unfinished. 


Here is another good example of what Fusion 360 CAD software can create with this image of the radiator cap and temperature gauge that I designed for my Bugatti model.  Again it would be very difficult to get this as smooth and finished with the 3D printer that I own so I will have to settle for the best that I can do when I complete the model.  


All five of the tires had taken me 43 hours to 3D print. I managed to get some nice detail in the tires by splitting them down the middle, 3D printing them and then gluing them together.  This gave me nice clean tires on both sides and the seam down the middle of the tire is almost invisible so it will look really good once the model is completed.

All in all the model of the Bugatti is coming along nicely.  I have not been keeping track of the hours of work that I have been putting in using Fusion 360 CAD software at this point.  The best guess is that it is in excess of 100 hours already and I know that I have a long ways to go before I can say the design is completed and I can plan on 3D printing all the parts to assemble the model.  A real challenge to be sure.  I'll keep you up to date with further postings on this project. 

Monday, March 11, 2019

1/6th Scale 3D Printed 1927 Bugatti Type 35 Model Project Part 1

This project has been in the works for well over a year.  Or at least it has been on my mind that long and I have finally cracked some of the design issues I had been struggling with creating this model in Fusion 360.


Here is a good photo of the real thing that I got off of a site called Supercars.net.  I created a Blender 3D model of this car back in April of 2015 and I always thought that it would be great to create a good sized real model of it.  I did not want a small model so I decided to make it 1/6th scale. As the real car is twelve feet in length the finished model will end up being two feet long.  I would definitely call that a good sized model.


A key piece that I had issues with in designing a model of the Bugatti was the boat tail rear end of the car.  I struggled with this portion of the car on and off over the past year or more and about a week ago I finally figured out how to get the shape modeled correctly. 

 Pictured above is an image from Fusion 360 of the design.  I will have to 3D print this part with the tail end sticking straight up.  To do this I added an additional brace to the model (shown on the left of the piece) that will be cut away once the part has been 3D printed. 

The best estimate of the time to 3D print this section of the 1/6th scale body will be somewhere around 25 hours.  One of my largest prints ever.  I sure I will be happy when I can hold it in my hands and call it a good part.


In order to get the model to scale and have all of the parts fit up correctly I started out using templates or blueprints of the car which I found online. The top image shows the side, rear and top of the car blueprint. To start modeling the car these images along with the front image of the car are scaled to the correct size and then aligned with each other so they can be modeled correctly.  I need to constantly check several different views to make sure I get every part modeled and lined up correctly.


In the bottom view you can see several of the body parts already modeled along with a couple of the wheels.  This gives you a good idea of how the car will look once all the pieces have been modeled in Fusion 360 so the completed model will look like the real thing when I am done.  Or at least as close as I am able to make it.


Along with the blueprints for the car I gather up a lot of reference photos so that I can get as much detail in the model as I possibly can.  The fact that the model will be two foot long when it is complete will make it possible to get some nice detail in the model much easier than a smaller model.  As you can see from the photos above again of the real cars there are a quite a lot of difference from one side of the car to the other side.


As of this afternoon this is where I am at with the modeling of the Bugatti in Fusion 360.  I am very pleased with how it is all coming together so far.  To give you an idea of the amount of work to create just what you see here take a look at the louvered section of the engine hood. This section has 23 louvers on each side of the hood.

 Each louver needed to be modeled one at a time and takes about 40 commands to create in Fusion.  That is over 900 commands to create just one set of louvers for the hood sides.  I still will need to create even more louvers that go on the top of the hood.  A slow process to be sure but again I want to get as much detail in the model as I possibly can.


I am very confident that the model will work out so I started making the tires. Again I referenced some photos of the Bugatti online and found a good tread pattern that was on a car.  I worked out the pattern and started 3D printing a couple of the five tires that I will need for the model.  The tires had to be split down the center of the tread so that I would have good tread and sidewalls on both sides of the tires.  Once two halves of a tire are 3D printed it is a simple task to glue them together using modeling glue making sure that the tread pattern and two halves are lined up to make it all look correct.  As you can see the tires are a good size coming in at 4.75 inches in diameter and just shy of .75 inches wide.


I have more research work to do on the car in order to create the model but I am happy so far with my progress. I will have to keep track of the hours that it will take to 3D print so that I can let you know how it all tallies up when I am finished putting it all together.  At this point I plan on not sanding the model smooth as I think I would loose a lot of detail in the model by doing so.  Some parts may need to be painted but that will not be a big issue. 

Here once again are images of the Bugatti that I created using Blender 3D.  So far I am liking what is turning out in Fusion 360 as well.  Being as the Fusion 360 model is looking very close to this Blender 3D model that is just a pretty picture and not something that I can 3D print.  

So you can see by comparing the Blender 3D images and the Fusion 360 model images that I am still working on that I have a lot of work ahead of me yet to get the model ready for 3D printing.  Lots of little parts to figure out how to design in Fusion 360 and 3D print. Then also how to put the actual model together once the parts are made.  It will keep me busy for some time yet but so far it looks like it is all possible and should be a lot of fun to create.  In the meantime I hope you enjoy seeing what I have put together so far and have plans for with this project.  I'll post more as I make additional progress. 

Monday, March 4, 2019

3D Printed Three Bladed Boomerang Project!

Roughly fifty plus years ago when I was just a kid in school I enjoyed playing with a toy that no longer is on the market.  This was a three bladed boomerang produced by Ohio Arts.  I am not sure if the company even exists today but I do remember the toy very well and thought that it would be great if I could find one.  I went online to see what I could find.  I only came across a couple of postings about the toy. One was an article about it and the comment that one had sold on Ebay for $200.  I then found the toy on a site called Etsy.  Here the seller also wanted $200.  I remember this toy only costing me a couple of dollars.  No way am I going to pay that kind of money and I knew that I could make it maybe even as less as what I paid for it as a kid. Another project presented itself once again.


The photo above shows what I had recently come across on Etsy.  This was called the HiYo boomerang.  It flew like a regular boomerang and I remember that you needed a good sized baseball field to fly it.  It was a lot of fun but there is no way that I would want to pay more than a few dollars for one even today.


I did remember that the original boomerang wings had an airfoil shape like what is on an airplane and with the information that I had gleaned from the Etsy site found out the dimensions of the wings as well.  It was at least a start.  I did a little more research online to find a suitable airfoil shape.  The diagram above gives you just an inkling of the different types of airfoils shapes that are used in aircraft.  The bottom shape called the Actual Clark Y was what I was looking for. 


As I usually do I started my design work using Fusion 360 CAD software.  The image above is what I came up with.  I knew that the distance of the original boomerang from tip to top was 12.5 inches.  Again this was valuable info as it made laying out the new design much easier to work out.  I took the original boomerang photo from Etsy and scaled it to the 12.5 inch tip to tip size.  From there I copied the airfoil shape on the tip of the layout and again near the center of the new boomerang design.  After this was completed I simply lofted the airfoil sketches to form one of the wings.  I knew at this point that the shape of the wing looked good.  

Next I took the first wing shape and made a circular pattern around the center axis of my computer model.  This gave me the three wings I needed for the toy.  After some cleanup of the model to get the nice smooth shape where the three wings overlapped I combined all three parts into one body or component.  I decided to make a recessed triangular area in the middle of the toy and insert an additional triangular part with a star cut out in the middle just to give it a little Tinker's Workshop style.  


Here is how the finished boomerang looks this morning after 3D printing, sanding, and painting was completed. This is actually the second test model.  The first model I 3D printed worked right out of the box on the first throw.  The only trouble was that my back yard was nowhere near big enough to fly the first test model.  (My mistake.) With the first throw I made the boomerang immediate made a 180 degree turn, flew over my garage and to this day I still have not found it.  Luckily I did not 3D print the first test model full scale.  That boomerang along with this latest one is only half scale being eight inches in diameter. It was much quicker to make it this size and if it failed would be easier to try and correct any design flaws to make another test boomerang.  

My 3D printer will be able to make the full sized version which will be sixteen inches in diameter if and when I find that the second test model flies as well if not better than the first test version did.  I will test the second model out in the next couple of weeks when the weather starts to warm up a bit and I can get to a baseball field that is near my home. (Seven below zero out today....ouch!)  At least there I can give it a good throw and still be able to see where it lands so I don't loose this boomerang like I did with the first one.  If it all works out I will then 3D print the full sized version that takes over nine hours to 3D print.  I'll let you know how it all turns out.   Have a good one!