
This afternoon I put together a small test project that has been on my mind for some time. The idea for the project came together a couple of weeks ago when I found a video on YouTube on how to make multi-colored parts on my 3D printer that has only one extruder. I liked the idea and saved the video to my computer for future reference. More about this in a minute.
A couple of days ago I got to talking with my sister about my 1970 dune buggy that I have been making several projects for and thought one thing was missing. A peace sign hanging from the rear view mirror. With that idea along with the multi-color 3D printing video this little test project was born.

With the project being a peace sign I knew that I had to make it red, white and blue. Pictured above is how the little sign turned out. With the video that I had found on YouTube I was able to make the necessary changes to the G-Code in Cura slicing software for my 3D printer so that it would pause after each layer of colored filament had been completed. I designed the peace sign using Fusion 360 and made it so that it was .60 of an inch thick over all. The diameter of the circle is exactly three inches.
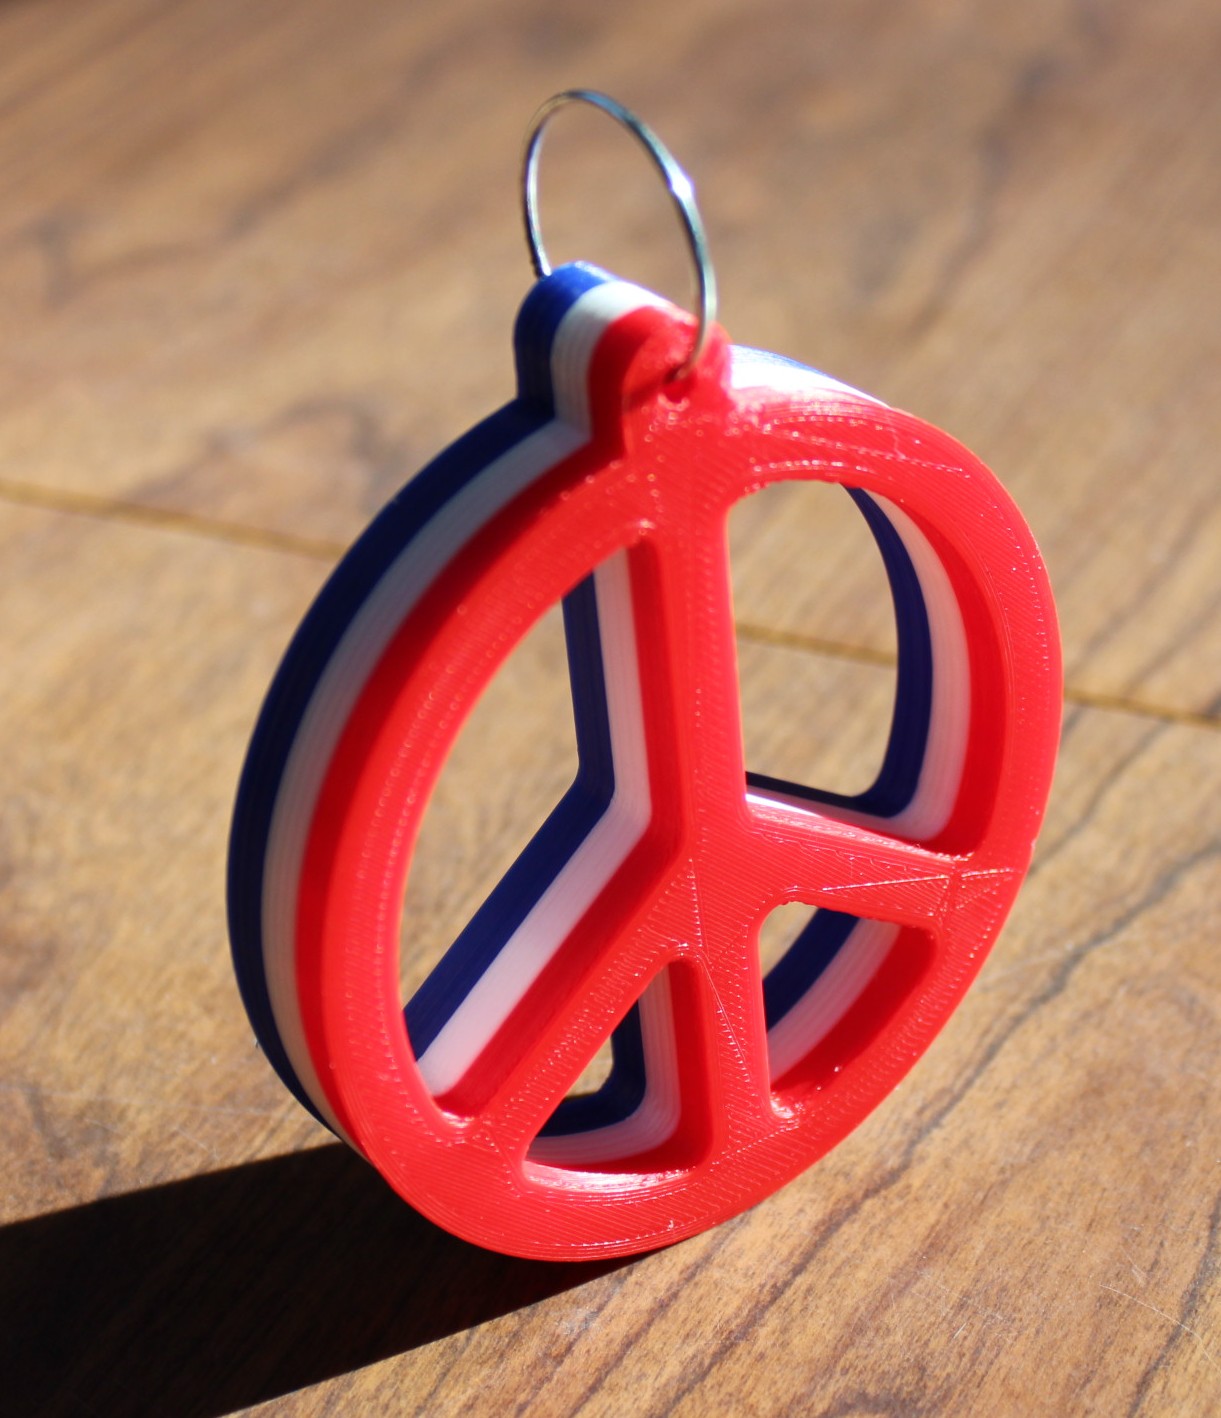
I did not want the peace sign to be to large so I thought that it would be about the right size at three inches in diameter. I started with the color red first on the 3D printer and after it had reached .20 of an inch in height it paused so that I could change the filament to the color white. The first time I had tried to print the part I had the wrong filament in and so I had to start over. I thought I had red in the machine but it did not look right. It looked more orange than red so back to the beginning. Luckily I had a new spool of bright red ABS filament sitting next to my machine so it was not a major setback.

Once I had changed to the white filament for the second part of the project I just let it run until the next pause came up on the printer. I finally added the blue filament and as you can see from the photos it worked perfectly. When the 3D printer paused so that I could change filament the extruder moved to the center of my print bed so it was out of the way. I then changed filament after which I went back to the control panel for my Creality CR-10 S4 printer and told it to resume the print. The printer then came back up to the correct temperature to print the following layers and it matched everything up perfectly. A no brainer so to speak to make it all work out as well as it did.


The perfect place for the peace sign.... the rear view mirror of my dune buggy.


The perfect place for the peace sign.... the rear view mirror of my dune buggy.
Here's the link for the video from "Frank's 3D Shop" on YouTube to show you exactly how I made my little peace sign. It is an easy video to watch and follow so you should have no trouble in making multi-colored parts on your 3D printer just like I did without having to have a dual extruder on your printer. Good luck!
No comments:
Post a Comment