
The last couple of days have been the perfect time to continue working on my giant Lego gyrocopter man project with all of the COLD weather that the Midwest has been enduring these past few days. To stay in my nice warm computer room and print 3D parts most of the day sure feels good. So with that in mind here is my progress so far.

I started with the tail feathers first as I thought this would be the most difficult portion of the build. Hopefully at this point I am correct is saying so. The photo above shows the vertical stabilizer for the gyrocopter. The goal for this portion of the build was to figure out how to put the aircraft numbers on to the tail. I did not want to create a decal as I wanted something with a bit more detail in it. I instead designed an opening in the stabilizer that the number plates could be inserted into. Also the original design had the rudder attached to the stabilizer when it was to be printed. This simple would not work and get the effect that I was looking for. So I opted for two small metal pins that the rudder would be mounted to. The next question is what to use for pins. Another brainstorm came about as I used a large paper clip cut to size. Just heavy enough for strength but still small enough to mount easily.

The rudder pins are glued into the vertical stabilizer and then the rudder is slid on to the them with mating holes. With the number plates glued into place the look works and is an easy part of the assembly.

Next the horizontal stabilizer for the tail was printed. This was glued into a matching channel at the bottom of the vertical stabilizer. You can see the additional channel in the assembly above that this assembly will mount to the framework of the gyrocopter.

Here is a view of the tail assembly mounted onto the gyrocopter frame. The structure just forward of the tail assembly is the engine mount.
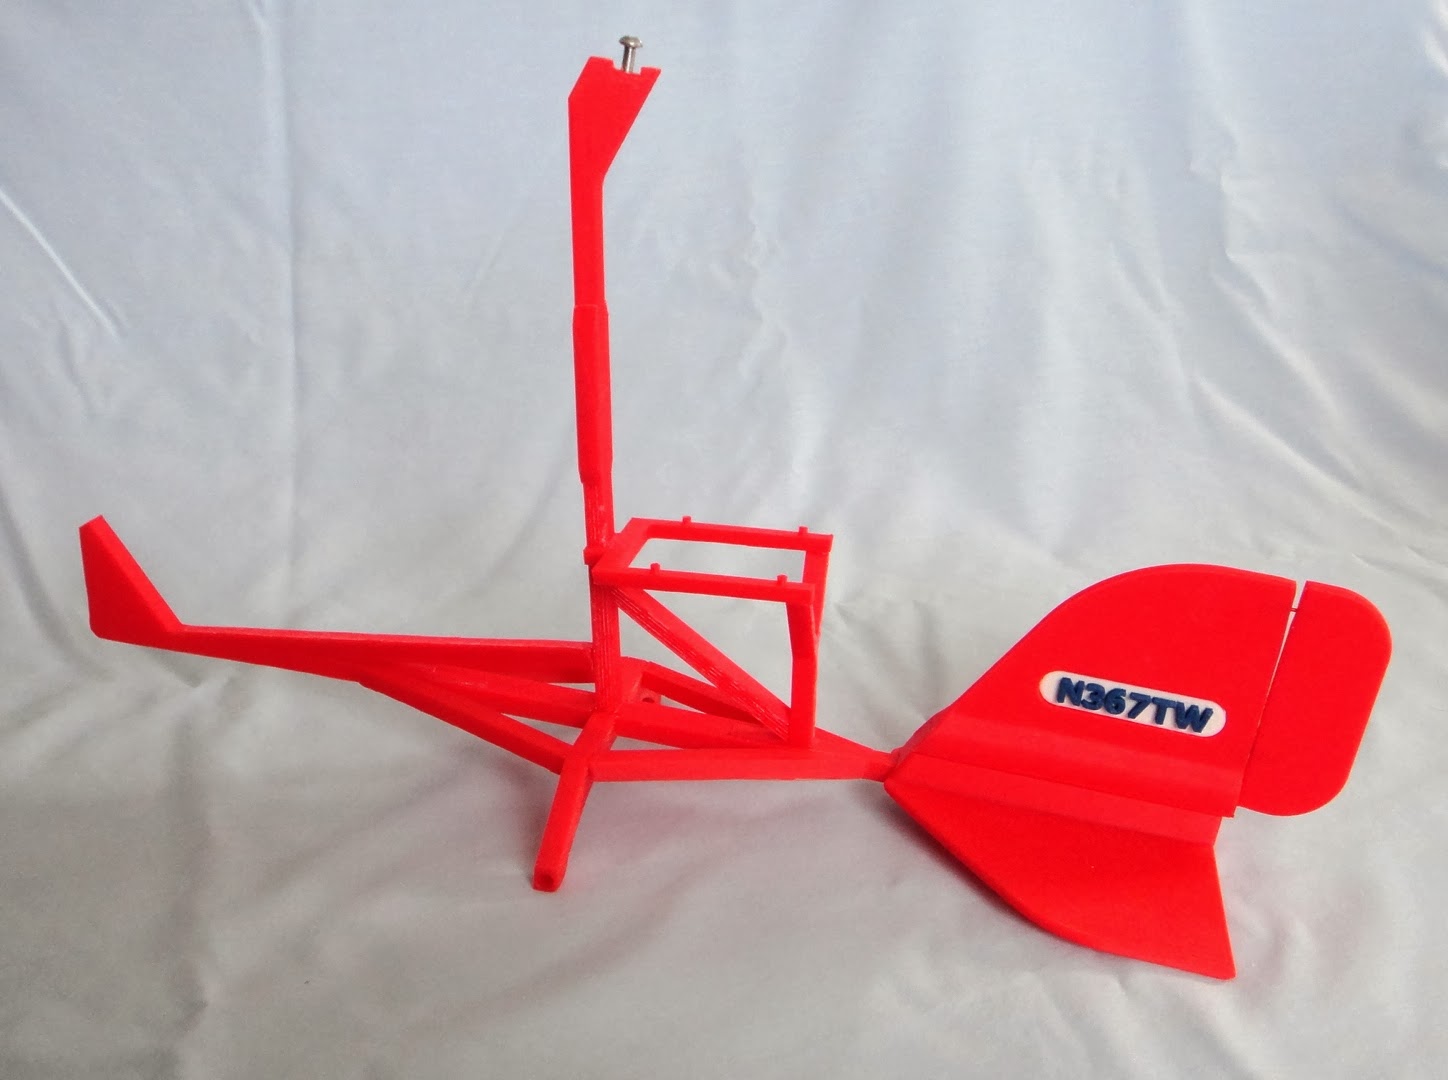
This is a good overall view of the gyrocopter at this point. Total hours to print what you see here has taken just a little over 13 hours not including assembly or design time. For design time I can only guess at this point that the hours have to be around 25 or 30 hours time. So I put a lot of thought into my designs before I even start making the first part. The gyrocopter framework as you see it here consists of 42 separate pieces that were pinned together in various places using 1/4 inch aluminum rods and regular plastic glue for models. Size of the assembly at this point is 12 inches tall, 21 1/2 inches long and 6 inches wide. This will only get larger as I add more parts to the assembly. The machine screw at the top of the mast will mount the main rotor and allow it to spin freely.
I am very happy with the progress that I've made and the alignment of all of the parts for the assembly turned out very well. Next I will work on the wheels and axles that need to be mounted. Luckily there are only three separate wheel assemblies that need to be made so it should be a simple task for the project. At least that is what I am hoping for anyway. Enjoy the photos.
No comments:
Post a Comment