
The last few days have been a massive push to print all of the parts for the 3D Jenny aircraft model project. Total time for this project has been climbing with this push. Design time was 50 hours and now with the printing of all of the parts for the model this time has doubled to 100 hours and counting. This is how all of these parts look so far.

This photo gives you a good idea of the scale of a couple of the parts for the plane. Above the dime in the photo is the frame for the windshield. The seat with the white cushion turned out perfectly and will look great in the model once it has been completed. The grids that these parts are sitting on are called rafts and are printed on the heated platform of the 3D printer so that the part being made stays where it needs to be while it is being made. The rafts are removed when the parts are being set up for final assembly.
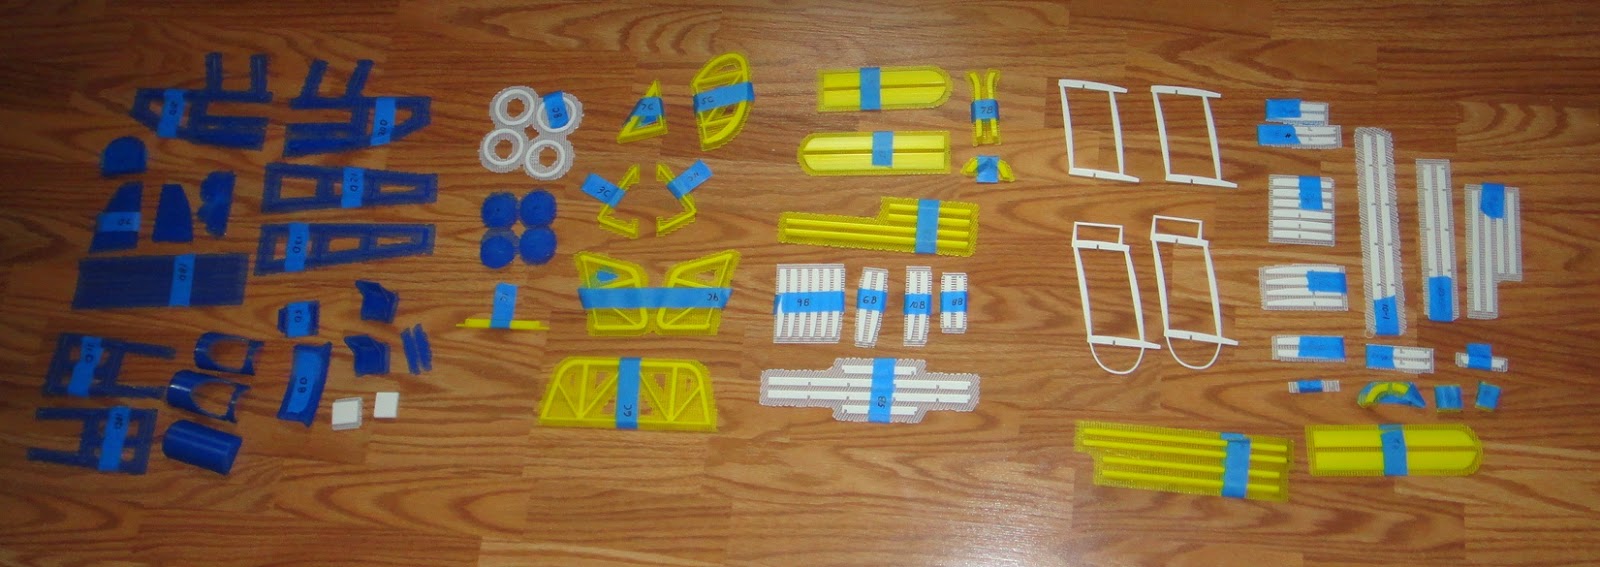
This photo shows almost all of the parts that will be needed for the model. I shot this photo yesterday only to find out that I had not yet printed the parts for the ailerons and the engine. So back to printing was the order of the day. With all of the parts printed the total for the model comes up to 177 parts. No worse than some of the other projects that I've put together over the past few years but still a pile of parts. So you can see I will have my work cut out for me.

In this photo you can see as before that I have the rafts for the parts still on everything. I also had to label all of the various parts to keep everything straight for the final assembly. It will help for sure.
Each of the parts are laid out for various sub-assemblies such as Top Wing, Bottom Wing, Tail Section, Fuselage..etc.

To start the assembly I pulled an old bulletin board out of mothballs that I had stuffed away in a closet. This makes a good working surface to start assembly of the model. I covered the cork surface of the board with plastic wrap. This will keep the parts from being glued to the bulletin board and be pinned down to keep every thing lined up properly during assembly.

I used push pins to hold the parts for the upper left wing assembly 'as you can see in the photo above. I'm sure glad that I have a pile of these pins to do the job. It will take a while to get everything lined up correctly for each section that needs to be put together. The missing ribs in this section of the wing will be added in the final assembly of the model once the upper and lower wing struts are added to the model and the wings are combined. Will be a real trick to get it all set up. Just will have to take my time with it.


These last two images are what the model will look like once I get it assembled. I originally was going to have the wheels in blue but this had to be changed once I got the parts 3D printed. They did not turn out exactly the way I wanted so I am in the process now of sanding the parts smooth and prepping them for red paint. I also was going to have the seat in red but decided that the blue and white layout looks a lot nicer.
Once I get the model assembled I will look into adding the flying wires that were on the real plane. This will be a task for sure but will add a lot of detail to the model if I can get it all put together that way. Again the model will have a three foot wing span and will be almost two feet long. Should be pretty impressive for sure. I'll post more photos of the project as progress is made with the assembly portion of the Jenny. Enjoy these photos in the mean time.
No comments:
Post a Comment