Wednesday, June 11, 2014

The Velomobile In Living Color!

With all the things going on here at the Tinker's Workshop I still am plugging along with the painting of the velomobile.  Not that I can say it is finished yet....sorry.  But the project is looking better and better each day that I get some work done on it.  So with that said here are the latest photos and the progress that has gone on.


A few days ago I finally was able to unwrap the covering from the velomobile to see how the painting of the white accent stripe had turned out.  The photos look great but I am a fuss budget when it comes to paint and there are spots that I had to go back and touch up once again to get it as perfect as I can.   Nothing really major but the mistake I had made was using a bristle brush instead of a foam one. Much easier to get a near perfect finish with this paint without streaks or miscellaneous brush hairs in the paint. You learn by your mistakes.


After the paint had been corrected and I was happy with it I again wrapped the velomobile with paper and tape to cover up the newly painted white on the body.  


This is the first coat of paint that I  applied this morning.  All with a foam brush.  Looks like it's been sprayed on.  The paint will be left to dry for the next couple of days as I will not be able to get back to the project for at least that amount of time due to my son getting married.  Another great day in my life to be sure so this being put on hold for such an occasion is well worth the wait. 


The finish on the hood of the velomoble really stands out in this photo. The paint is dry and has a terrific gloss to it.  All that sanding I did on this piece and the body pays off when you can get this nice of finish.


This is another good shot of the front of the velomobile.  The red paint will really standout in the sunlight when I get the project finished.  When I can get back to painting again I will scuff the paint down with 320 grit sand paper and then lay down the second coat. Hopefully in another week or so I will quit fussing with the paint and get the entire body put back on to the chassis.  That's the plan anyway.  I'll post the latest info on this project just as soon as I can to keep everyone up to date.  Enjoy the photos.


Thursday, June 5, 2014

The Velomobile Is Being Painted!

A big day today as paint is finally being applied to the velomobile project after many months of construction. The paint that I decided to use is a polyurethane paint for boats called Brightside paint.  I used this paint on my three section kayak and had great success with it.  It is brushed on and when it is dry it looks like it has been sprayed on.  It's that good.  Also it has a nice durable glossy finish that should hold up to years of use.  
This is a computer image that I put together of a first draft of what the paint scheme I thought should look like.  You'll see that some of this design is good and not so good in the real world.  Follow along to see how the project is progressing.


The first step that I took yesterday was to layout the painters tape on to the body for the paint scheme that would be to my liking.  One concern was the front signal light housings.  The white paint that I had planned for the body needed to be completely in line around these housing to make painting easier.  So I was happy that things worked out with what you see here.  As you can see the stripe on the side of the body has gotten a bit narrower at this point compared to my computer image.


Next came the layout for a circular decal that will be placed on both sides of the body which reads "Radius T-T Human Powered Vehicle".  The original decals that I had made ended up being way to large to look right on the velomobile.  So luckily smaller once were also made up that should fit the bill. On the side of the body you can see two black curved lines in the middle of what will be the white stripe on the body that goes from front to rear and over top of the rear cowl.  This is where the decal will be placed and at this time will be covered up with paper.  This section of the body will be painted later when the rest of the body is painted a bright red.  This is also a change from the original idea as getting the decal positioned on to the white stripe looked to be to much in the middle of the cockpit so I moved to farther to the rear of the body.  Also the curved stripe was replaced with an angled strip at the rear simply because it was easier to get it to lay out correctly.  The curve was pain to get smooth and uniform so the idea was scrapped.


In these two photos the body has now been completely covered with painters tape and paper where I do do not want paint to be applied at this time.  Kind of looks like a badly wrapped Christmas present at this point.


I applied the first coat of white paint this morning.  This paint is rolled on first and then a brush is swiped across the paint to remove bubbles.  This is very quick and easy to do and  gives the surface a very nice smooth glossy finish.


Once the first coat of paint has dried for at least 12 hours it will be sanded using 320 grit sandpaper to prep it for the second coat.  This will help clean up of any imperfections with the first coat of paint and smooth it out for the second coat.


Already after the first coat of paint you can see how smooth and shiny the surface looks.  All of my sanding on the body pays off in a big way when I can get a look this good already at this point.


Once I get the second coat applied and cured I will decide at that point if a possible third coat needs to also be applied. Just something that I will have to look at when I get that far along. When I am happy with the white paint stripe I will strip off all of the tape and paper and then cover up the stripe and begin painting the rest of the body. So far I am happy with what I see so it is a good sign that the painting process will turn out well.  Hopefully in another few days I'll have more to show you.  Enjoy the photos.

Tuesday, June 3, 2014

Finally Completed Sanding The Velomobile.... On With The Paint!

For all of you who have been following my progress with the velomobile project the past couple of weeks have been nothing but sanding, priming, wet sanding, body touch up.  Then you repeat this process over and over and over again until you have either a flawless body or you go insane after repeating the process over and over again.  I think I fall somewhere near the flawless body and went past insanity at least a week back.  Actually the body looks really good at this point so I made the decision to move ahead with final painting of the project.  With doing nothing but sanding there was really no need to post daily progress reports as each day looked like the last until today. 


I knew that when I had to paint the body that the dolly that the body had been cradled in all of these months would not do.  I needed something that would support the body from the inside yet be tall enough to paint the underside. This framework I put together today from scrap wood I had laying  around the shop.  It stands three feet tall, two feet wide and four feet long.   Light enough to move around easily but still strong enough to support the body of the velomobile.


Here you can see the velo body on the sanding cradle and the difference in height between it and the painting stand.  The big problem with the cradle as far as paint is concerned is the that the body is support by nylon web straps.  These would just be in the way when I am painting the body.


Here's the body now fully supported by the painting frame.  The interior of the velomobile will remain painted in gray primer and all of the exterior now can be painted now without any complications.  It also is plenty high enough off of the ground so that I can easily paint the underside of the body.  Luckily there is not a lot of painting to do on the underside and so it should be quick work to get this part of the painting done.


Here's a good shot of the painting frame inside of the velomobile body.  Once the body has been painted I will lift the body off of the framework and then place it directly on the the TerraTrike frame that has been ready for that day months ago. 


The now empty velomobile body dolly will be disassembled and recycled for other projects in the future.  It has served it's purpose very well.   This will be a quick job and will free up the space I need in the garage to be able to layout the new paint scheme for the velomobile.  I have the pin striping tape on hand and some decals for the body all ready to go.  I will try and get photos taken as I set up the body for paint in the coming week.  It will be nice to see some color on the project after all of this time. Total hours on the project has risen to 563 at this point.  Lots of hours to be sure but also a lot of fun along the way.  Check back soon as the project will start moving forward again in a very short time. 

Wednesday, May 14, 2014

The Tinker's Workshop Has A New Sign To Show Off

The Tinker's Workshop has always been in need of a sign in the shop to be proudly displayed when I showed off the shop as well as the projects in my videos or personal tours that friends and family have enjoyed.  Today this project has finally been completed after many months of waiting for warm weather to get the painting done on the project in my garage.  Here is how the sign looks in the shop along with how I put it all together.


Ever since I put the workshop together I wanted a great looking sign to put the icing on the cake so to speak to show the space off just that much more.  With the success of the blog being what it has become it was only fitting to use the logo from the blog's home page and recreate it as sign for the shop.


I started as usual with my computer and modeled up all of the letters that were needed for the sign in Inventor 3D software.  I laid the logo for the blog into the software and recreated each letter one by one and figured out what scale I wanted the sign to be.  The largest letters are four inches tall and were printed on my Makerbot 3D printer during the winter months when there was a lot of snow on the ground and way to much cold to even think about trying to do any other work in the garage.  As you can see from the photo above a couple of the letters (K and P) are a different shade of blue than the rest.  This being because I ran out of blue plastic in mid-project and had to use what I had on hand.  Needless to say the parts did not match.  So painting was called for at a later time. 
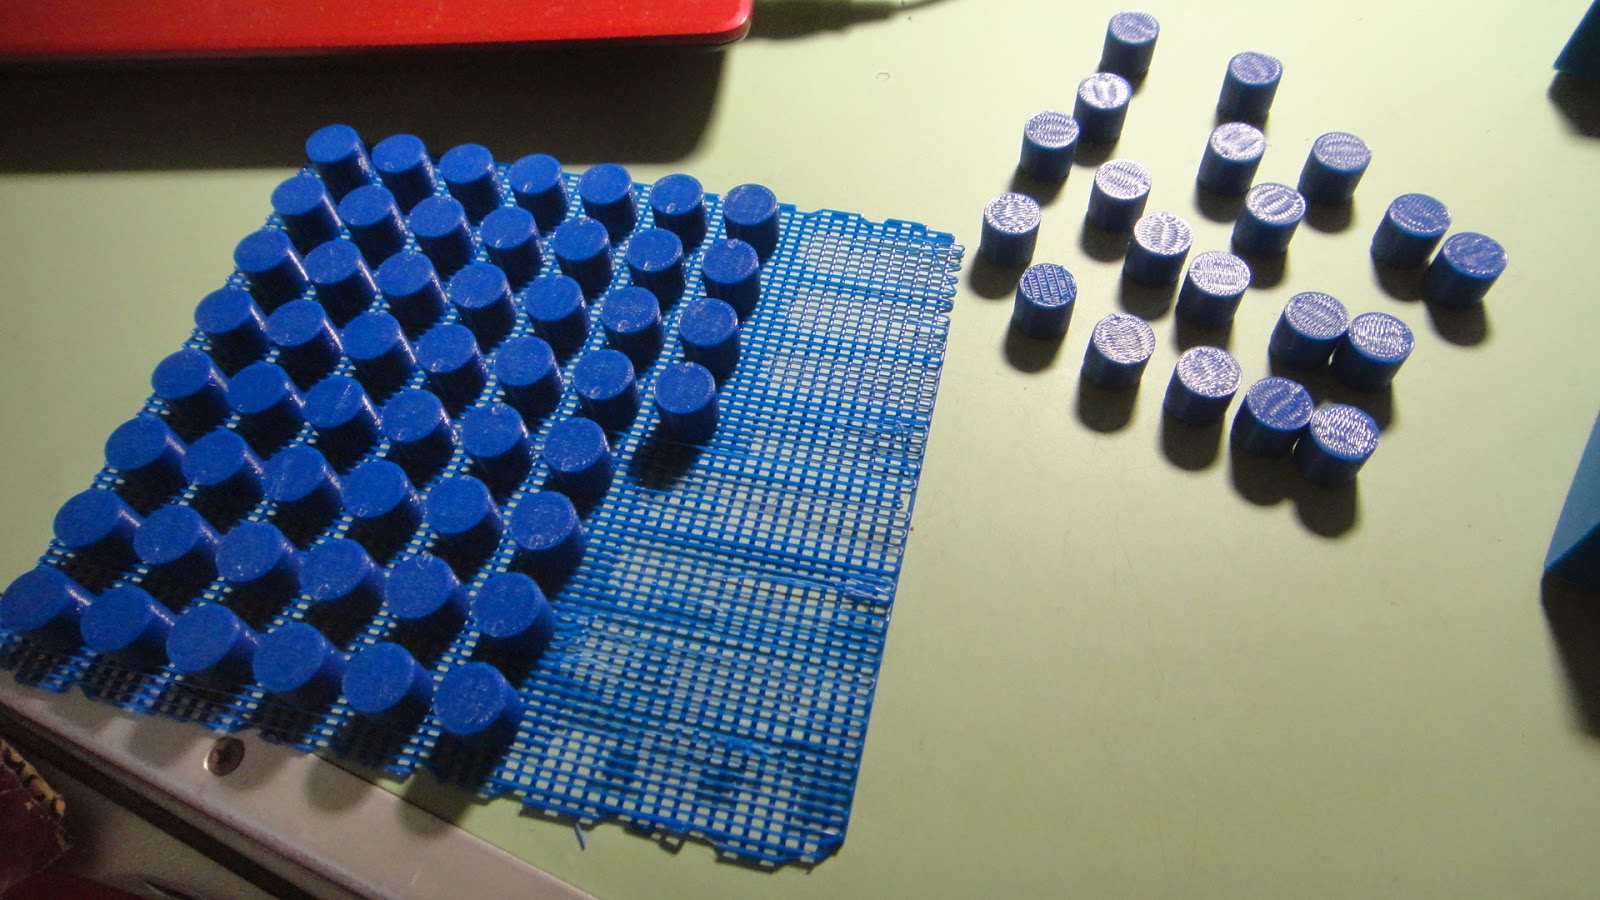

I didn't want the letters to be just attached flat to the background board so I also printed up little spacers that would be glued to each letter to move the letter away from the background and give a nice effect at the same time.  


Lots and lots of little spacers were epoxied on to the backs of each of the letters.  It looks like a lot of work but this step in the project took only five or ten minutes at most.  The white around the spacers did not matter as once the sign was mounted on the wall the epoxy would not be seen.


Once the epoxy holding the spacers on to the letters had cured over night I then could spray paint all of the letters the same color blue.  The spacers also made this portion of the project easy as it was a simple task to have the letter stand up on their own while the painting was being done in my now nice warm garage.


Next came the process for building the background board for the sign.  It was made using 1/4 inch plywood for the face of the background.  The photo above shows the build underway with the attachment of one of the outer rails to give the piece strength as well as definition for the sign. 


The largest piece of 1/4 inch plywood I had on hand was only 48 inches long.  As the sign had to be 58 inches in length a 10 inch piece of additional plywood had to be butted up to the first piece and then a backer plate was glued into place to secure the pieces together. 


The upper and lower rails for the sign were glued and clamped on to the plywood using wood clamps.  I then used small wire brads to nail the assembly together and removed the clamps.  


The ends of the background assembly were then cut at a 25 degree angle using my miter saw.  Additional wooden pieces were than cut and fit between the outer rails. These were then glued, clamped and nailed into place to finish off both ends nicely.


Here are a couple of good shots of how the background assembly looked once the clamps had been removed from one of the ends of the piece.  The background piece is 7 inches tall and 58 inches wide.


I counter sunk all of the nail holes next and used wood putty to fill them in and let everything dry over night.


This is how the nail holes looked once I sanded the assembly the next day.  Much better looking than having nail holes showing for sure. 


Next came a couple of coats of primer.


Then a couple of coats of bright yellow paint.


Then yellow/orange paint.


Then the final coats of light brown paint. To do the transition between the colors was just a matter of eyeballing the paint as I went until I was happy with the result.


I let the paint dry on the assembly for a good day  and then brought the it back into the workshop to figure out how to mount the letters properly.  What I did was lay a 2 x 2 on the face of the assembly making sure to align it to the lower edge. Once this was done I put a piece of painter tape on top of the 2 x 2.  As the 2 x 2 is really only 1 1/2 inches wide and the letters being four inches tall this left exactly 1 1/2 inches of space at the top of the letters so this would center them perfectly.  Next to the tape I laid down a four foot metal ruler so I could mark out the tape for the letters.


I had once again used my computer to give me the exact locations for each letter by measuring from one edge of the assembly to each letter and transferring these measurements to the painters tape.  I also marked down what letter should be at what mark. This way the letters could be moved against the 2 X 2 to keep the name lined up and the marks would keep the spacing looking good


Once I was happy with the placement of all the letters I once again used more epoxy to mount the letters to the background assembly. 


With the sign being hung on the wall the epoxy around the newly mounted spacers on the letters would not show unless you were directly under the sign and looking up at it.  So I was happy how I managed to get all the letters on the sign mounted correctly without much hassle.


As you can see here I hung the sign over top of my workbench which is the first thing that anyone would see when coming into the shop.  It will make a nice background for the video presentations that I do from time to time for the blog at the shop as well. The new sign gives the Tinker's Workshop just a bit more of a professional look even if my workbench needs a good cleaning right now.  No matter as I can at least scratch another project off of my to do list once again. If you want a closer look just click on any photo and it will give you a better view.  Enjoy.

Saturday, May 3, 2014

Detailed CNC Test Part Using Free VectorArt3D Software

After quite some time I have gotten back to using my CNC machine once again in the Tinker's Workshop today.  I have always been fascinated with trying to make new things on my CNC and yesterday I found the perfect test project that I have been wanting to try.  I was going through some old internet links that I had saved when I came across this CNC machining site.


This site has a good sized library of CNC 3D engravings that will come in handy in a lot of different projects.  I was able to download a free CNC software from the site that will take 3D vector artwork files and convert them to G-Code for my CNC machine.  Since the software was free and the VectorArt3D site also has some free samples to try it out I thought what could I loose but some time and a little styrofoam. As usual I cut all my test parts in foam as this is a  simple medium to use and is very inexpensive for this portion of any project.


The free software that I downloaded is called VectorArt 3D Machinist.  It is a very simple program to use to convert the VectorArt files to G-Code.  The image above shows you what the software looks like once you get it loaded into your computer.  I had to download the software and then restart my computer.  Once I did the restart I was able to install the software from the download and get it running.  The picture of the engraving you see is one of the free sample files available from the VectorArt 3D web site.  I liked the look so that was the plan of action for today's CNC project.


This is how the foam test part looked just after an hour of milling using a 1/4" flat bottom CNC bit.  This was after three passes and is called the rough cut.  The project is taking shape at this point and so I  was moving forward once again and pressed on to do the finishing pass on the part.


Here you can really see a difference in how the part looks.  You can still make out faint lines on the part and it is not perfectly smooth but is a much more finished looking part at this point.  I was using a 1/4" bit called a ball nose bit which cleaned things up quite a bit. A ball nose bit when spinning is rounded over at the tip. The bit also was making one pass to clean up the part but each pass was only 1/32" wide.  The rough pass was 1/8" wide and took three passes to complete in one hour.  The finishing pass took the same amount of time but with only one pass.  If this was the real wooden part I could do some light sanding on the part and call it good.  I am very pleased with my first attempt at this type of CNC made part. 

 I could change the finishing bit to a smaller diameter bull nose bit and the finished part would be smoother still.  Just a matter of how detailed you want the part to end up like.  This part is ten inches in diameter so the larger bits look pretty good.  But I suspect that if the part were a third this size it would need the smaller diameter bits to get the detail that you see here.  Anyway I am happy with my first effort.  Check out the VectorArt3D website for the free software and samples and a look at their library.  I know I'll be looking at it again soon.