Monday, September 22, 2014

Refining The Tinker's Workshop Logo Using Blender 3D

With three years passing since I've started this blog I got to thinking about all the projects that I have worked on in that time.  Lots of hands on stuff with everything from 3D printing to fiber glassing projects and 3D computer graphics.  Not to exclude wood working projects too. This all has been a lot of fun and so with that it mind I thought I would once again update the logo I use for the blog using Blender 3D software.  If you have never heard of this free 3D modeling and animation software I suggest that you take a look at it online.  I use it for all of my 3D modeling and this little project of remodeling my logo is made for this software. 


This is an image of the original logo that I did some time back for the blog and have used for some time now.  It looks good and all but I thought it could be a lot better.  So with that in mind I went to work updating what you see here. The first thing that I thought was to remove the visitors and counting line.  Just way to much wording for the logo.  Next was to remove all of the cartoon looking pictures for Dreaming, Designing, and Building.  


Here was the start of my idea to update the logo.  I liked the idea of making it more three dimensional and I think my efforts using Blender 3D turned out very well.  The tough part in the image you see above was to make the light bulb light up.  Luckily there are a ton of tutorials online that I could search through to put this idea together and make it look right.  I removed the "Counting line" and modeled all of the tools to give the logo a more realistic look.  I then rearranged a few things to finish it off.  I had to tip the entire layout to be able to get the full three dimensional look but with the entire background being black and larger to get everything into my image it still was not just right in my eyes. 


I took the rectangular image and brought it into another piece of software from Autodesk called "Sketchbook Designer".  Here I was able to remove a large portion of the black rectangle and replace is with an oval instead.  This made the tilted logo make just a bit more sense.  I then topped it off with another oval ring around the entire image to complete the project.  In all it took me a couple of days to get everything put together and working the way I had envisioned it and I think the end result works very well.  

For more information about getting your own free copy of Blender 3D go to WWW.BLENDER.ORG. There you can download the latest version of the software plus get a lot more links to forums and tutorials on how to learn to use the software.  Also for more images of what I have created using Blender check out the link at the top of the page titled "Blender 3D Creations".  

Monday, September 15, 2014

The 3D Printed JN4D Jenny Model Is Completed

Another rainy day has brought me to the completion of another interesting project.  This being of course my 3D printed JN4D Jenny aircraft model that I have been working on over the past few weeks.  I finished assembly of the model this afternoon and was pretty pleased at how it all turned out.  So I shot some photos right away so I could show it off to everyone here. 


 One of the last difficult tasks in building the model was to join the wings to the fuselage. I had to scrounge up some foam rubber from the workshop to support the wings and fuselage without damaging the already delicate assemblies in the process.  The struts that are directly over the fuselage needed to be inserted into receiving holes that were in the mid section of the top wing.  The simplest way to do this and still see what was going on was to lay the plane upside down on to the foam pads. Then I was able to apply the needed glue and mate the assemblies together. 


Once I was happy with the fit of the upper wing I applied glue to the two lower wing sections.  These were then slide into place on to mounting pins built into the fuselage.  These pins help to correctly locate the wings for alignment to the fuselage sides. Then I waited over night to let the glue dry and held my breath to see how it would work out.  


 This morning I was able to remove the clothes pins from the model and find an assembly that was acceptable.  The plane only needed the landing gear to be installed next.  I placed the model again upside down on to the foam padding and inserted the landing gear supports into mating slots that are located on the inside of the fuselage.  Put tab "A" into slot "B" kind of a set up did the trick for both sides of the landing gear.  The axle assembly and wheels were then mounted on to the landing gear supports using plastic modeling glue and some painters tape to hold it all in place until it dried.


This afternoon I was able to remove all the tape from the plane and glue the radiator and propeller assembly on to the front of the model to complete it.  I immediately grabbed my camera to get the following photos as the plane as it is quite fragile and now is complete. 


Having a three foot wingspan and only weigh about a pound or so it is very light weight for it's size. The plane is also 23 inches long and stands 7 1/4 inches tall. The propeller is 4 inches from tip to tip.


 I've been asked by several people if the plane could fly.  This I have no doubt but I would hate to try and land it as it would probably not hold up very long to even a minor mishap.  The model would need more work done to it to beef up the framework and wings in order to make it sturdy enough to fly.  I never planned on making it radio controlled and will not cover any of the plane to make it so.  I wanted to show off the capabilities of a 3D printer and all the components that went into putting this model together. 


 Here the plane is finally hanging from my light fixture in my workroom. It was just a matter of using some plastic fishing line and using some simple metal chains at the top of the light fixture to secure everything. The light of the fixture bounces off of the plane nicely in these photos. Just one more project that I had fun putting together and I can now scratch off my to do list.
   I hope I've inspired some of you to attempt building something similar to this with your own 3D printers so you can show it off to family and friends like I plan on doing. In the mean time enjoy the photos and have a good day in your workshop.


Saturday, September 13, 2014

Jenny Project Gets Tail Feathers

With some rather cooler rainy weather over the past few days here in the Midwest I find myself just that much more focused on my 3D printed Jenny aircraft model that I have been constructing. This post brings more advancement to the project with the tail section being added to the model along with the main wings being joined together.  Here's how it all looks so far.


I was right about the color scheme for the model with the bright yellow tail and the blue fuselage. The horizontal stabilizer for the model mounted perfectly on to the tail of the fuselage as you can see in the photo.  I did not want to mount the vertical stabilizer and rudder until additional bracing for the horizontal stabilizer was added first to the model.  Just was the simpler way to get it put together.


In this photo you can see the underside of the horizontal stabilizer with the addition of the bracing. The actual plane had this bracing mainly because of the size of the tail being so large.  I figured that the tail in the real plane was about eight feet across.  So it made sense.  It took me a while to figure out the correct length and angles on these braces using my computer model.  Looks good and will be more solid too.  The piece sticking out on top of this assembly is the tail skid for the plane.  


 I only needed to glue the vertical stabilizer and rudder into place to complete the tail feather for the model.  I was happy that this portion of the plane had lined up so nicely.  The fuselage at this point only weighs 5.8 ounces.  Very light weight and very fragile.  


Next in the assembly were the construction and installation of the ailerons for the model.  The ailerons were built like the wings.  All the parts were pinned to my bulletin board construction board and then glued together.  Once the glue had dried and they were strong enough I glued them in place on to the outer rear portion of the upper wing assemblies. The clothes pins again help hold everything in place for this portion of the build.


The last big task was to join the two wing halves together.  This took a little time and a few more clothes pins to hold the now three foot long assembly together until the glue had set properly. 


Here's a couple shots of the finished fuselage and the wing assembly together.  The next big step in the assembly of the model will be to get these joined together.  The upper wing will be glued to the fuselage wing struts and the lower wing will be glued to the lower sides of the fuselage.  Again it will probably take a few more clothes pins and a steady hand to get it to line up properly.  So far I am pretty happy with my efforts.  After this has been completed all I have to do is add the landing gear and lastly the radiator and the propeller.  Should look nice in my workroom when it is done.  Enjoy the photos and keep tinkering!

Wednesday, September 10, 2014

3D Printed JN4D Jenny Aircraft Model Fuselage Taking Shape

The building of the 3D printed JN4D Jenny aircraft model has been interesting to say the least.  It has been some time since I've done any model building of aircraft much less one without instructions. The fuselage looked to me to be a simpler portion of the model to build than the wings.  Boy was I wrong!  The trick with the fuselage was to figure out what had to be built first and then go from there.  Then figure out how to hold all the pieces in place while the glue was drying.  So with that in mind I will cover my progress and how I solved these problems in this post.


 As with the wings I needed to first assemble both sides of the fuselage on my bulletin board that was covered with plastic wrap.  Each side of the fuselage was printed in three sections.  These were glued and pinned done to the bulletin board and then left to dry.  The photo above show the sides just after I removed all of the pins.  So far so good.


Next I had to figure out how to mate the two sides together to for m the fuselage into it's correct 3D shape. I was lucky enough to find some clamp on clothes pins as they held my parts tight enough while the glue was drying to get it set up correctly. In the design at the mid section of the fuselage is a small rectangular frame.  This part ties the lower wings together at the fuselage and helped with this portion of the build.  At the tail it was a simple matter of gluing the end of the fuselage tail sides and clamping it together with a clothes pin.  The tail of each side was designed with the correct taper already built into it so it would line up correctly when glued. At the nose of the fuselage I mounted the engine side covers and taped them in place to hold them securely.


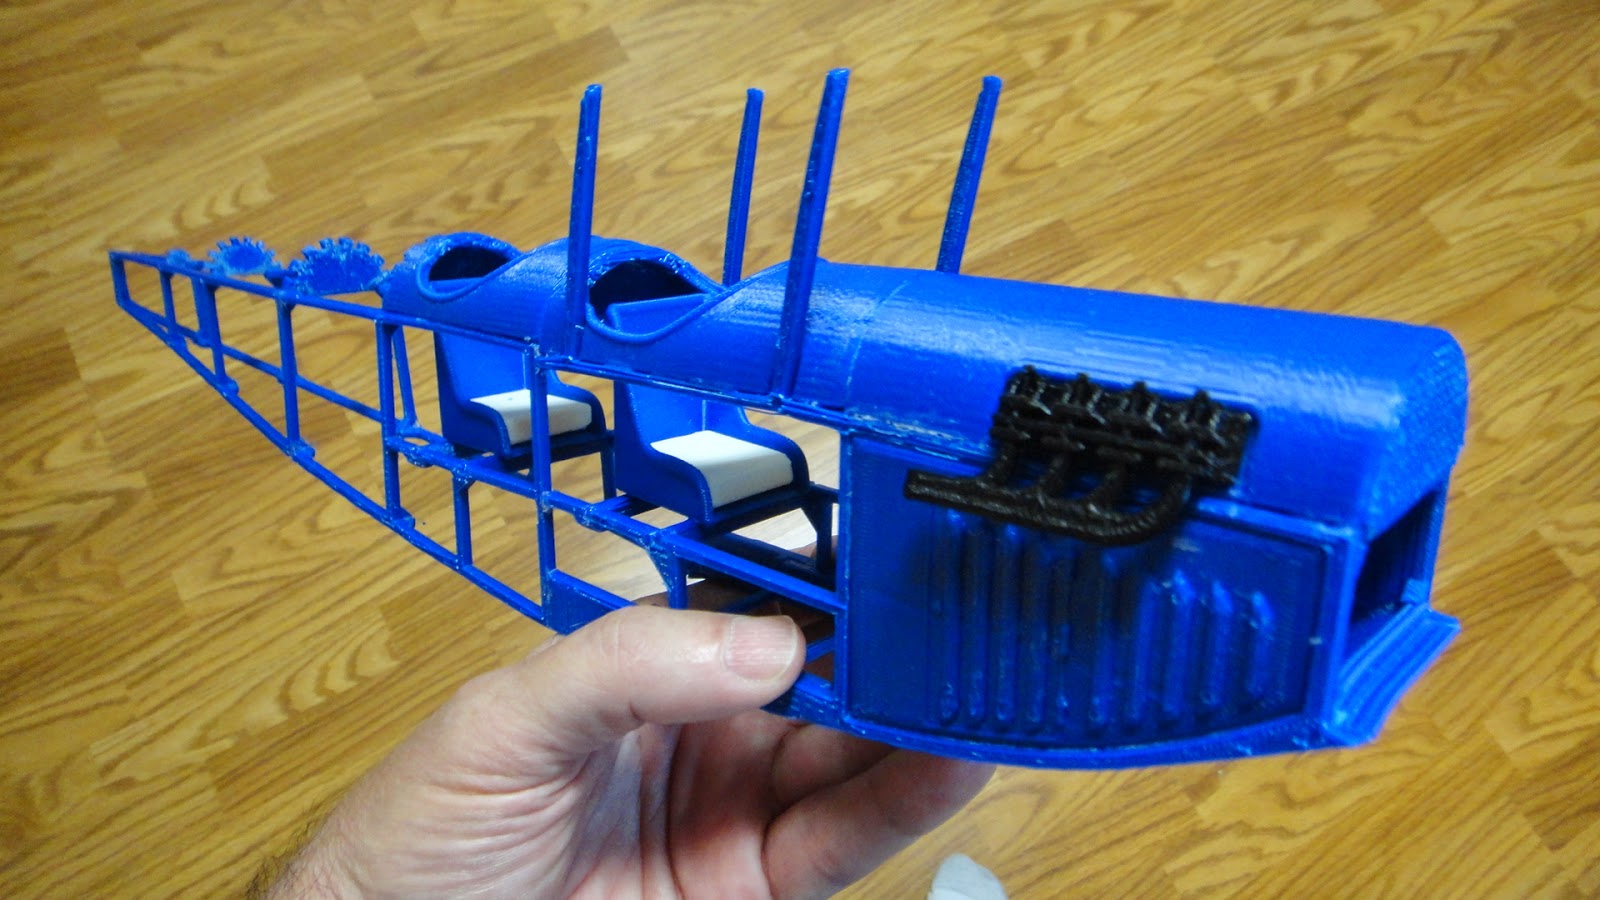
After a few hours of letting the fuselage dry I was able to mount the front seat into it's proper location in the fuselage. The vertical pieces sticking out of the top of the fuselage are wing struts that hold the upper wing in position just above the front seat. The sides of the fuselage where the seats need to be have indents designed into them so that mounting the seats with their frames would be easier.


Next the front cowling over the nose and front seat were mounted using painters tape and a couple clothes pins. This was left to dry for a couple more hours.


Here you see the nearly completed fuselage really starting to take shape.  I now have the rear cowling and seat in place along with the vertical supports for the rear turtle deck.  More bracing will be added to the underside of the fuselage along the tail section once I get farther along with this portion of the build. 


The engine detail stands out nicely now on the front cowling.  The radiator and propeller will be added near the end of the build as I do not want to risk accidentally breaking the prop during the build. At this point in the building of the fuselage it has become a lot stronger and I managed get it everything pretty well lined up to make it presentable for display.  The fuselage also at this point is 19 1/2 inches long and 2 inches wide.  From the bottom of the fuselage to the top of the wing struts is 4 1/2 inches.


The stringers for the rear turtle deck I glued into place this morning.  I was thrilled that these small intricate stringers slide into place perfectly right from the start.  I would have thought they would have been worse than putting the wings together.  Go figure. This section of the fuselage will really be a lot stronger because of these stringers.  It only took me about five minutes or so to put this portion of the fuselage together.  I taped the stringers down with painters tape to hold everything into place until the glue dried properly.  The very tail of the fuselage will support the horizontal stabilizer nicely.


Here is the horizontal stabilizer (on the left) and rudder (on the right).  The horizontal stabilizer is fairly large.  It is 8 3/4 inches wide and 5 1/4 inches tall.  The yellow color will stand out nicely with the blue fuselage. I will still need to create additional bracing for the underside of the horizontal stabilizer assembly but will not do so until it is in place on the fuselage.  This will be a simple matter of measuring where the mounts will be and doing some trial fit up to dial it in for the model.  
  I should have the ailerons assembled today and be ready for final assembly of the model in the next few days hopefully.  Will make a nice display for my work room.  Stay tuned for further progress and photos of the 3D printed JN4d Jenny aircraft model.

Monday, September 8, 2014

The 3D Printed Jenny Model Project Moves Forward

It has taken me a few days to get back to my 3D printed Jenny aircraft model project and so I thought I should bring everyone up to date on the progress thus far.  I think with this project the hardest part of building this model is or I hope is the wings.  I think I finally got a handle on this portion of the build so it is encouraging to see more of the assembly come together.


While I let the glue dry on some of the parts for the wings I started working on the wheels for the plane.  I printed the wheels in pieces that you see in the photo above.  This made it possible to get the wheels printed to the correct shape for the model.  I sanded the wheel hubs smooth and then painted them a nice glossy red.  Turned out very well I think.


Here I test fit the inner hubs for the wheels on to the axle for the plane.  The wheels do not need to roll so there was no concern about that aspect of the model.  This made things a lot easier in this portion of the assembly.  


Here the wheels and axle assembly have been glued and assembled.  I really like the right red paint and the white tires.  The tires are two inches in diameter and the assembly is four and one half inches long.  Should stand out nicely on the model once I get this assembly installed on the plane. 


This little box like assembly is the mid section of the upper wing.  It will be mounted just above the front cockpit of the plane.  The assembly is made up of eleven pieces that needed to be pinned down for gluing just as I did for the wings themselves.  The trick here will be to get this mounted on to both the upper wings and keep it all lined up correctly.  Another portion of the assembly where I will have to keep a steady hand and a close eye to get it correct the first time out.  I will have to keep my fingers crossed once again for this portion of the build. 


Here's a close up view of the front radiator and propeller assembly.  The yellow center shaft is slid through the back side of the radiator and then protrudes toward the front so the four inch prop can be attached.  All of these parts are friction fit so if heaven help me this assembly should ever be damaged I can simply press out the shaft and print a new one.  Hopefully that will never happen but in this instance it is a good idea just in case to have it set up this way.  The propeller was printed using my 3D printer but was so thin that I had to reinforce it by coating each side of the blades with a thin layer of fiber glass.  Turned out very well I think.


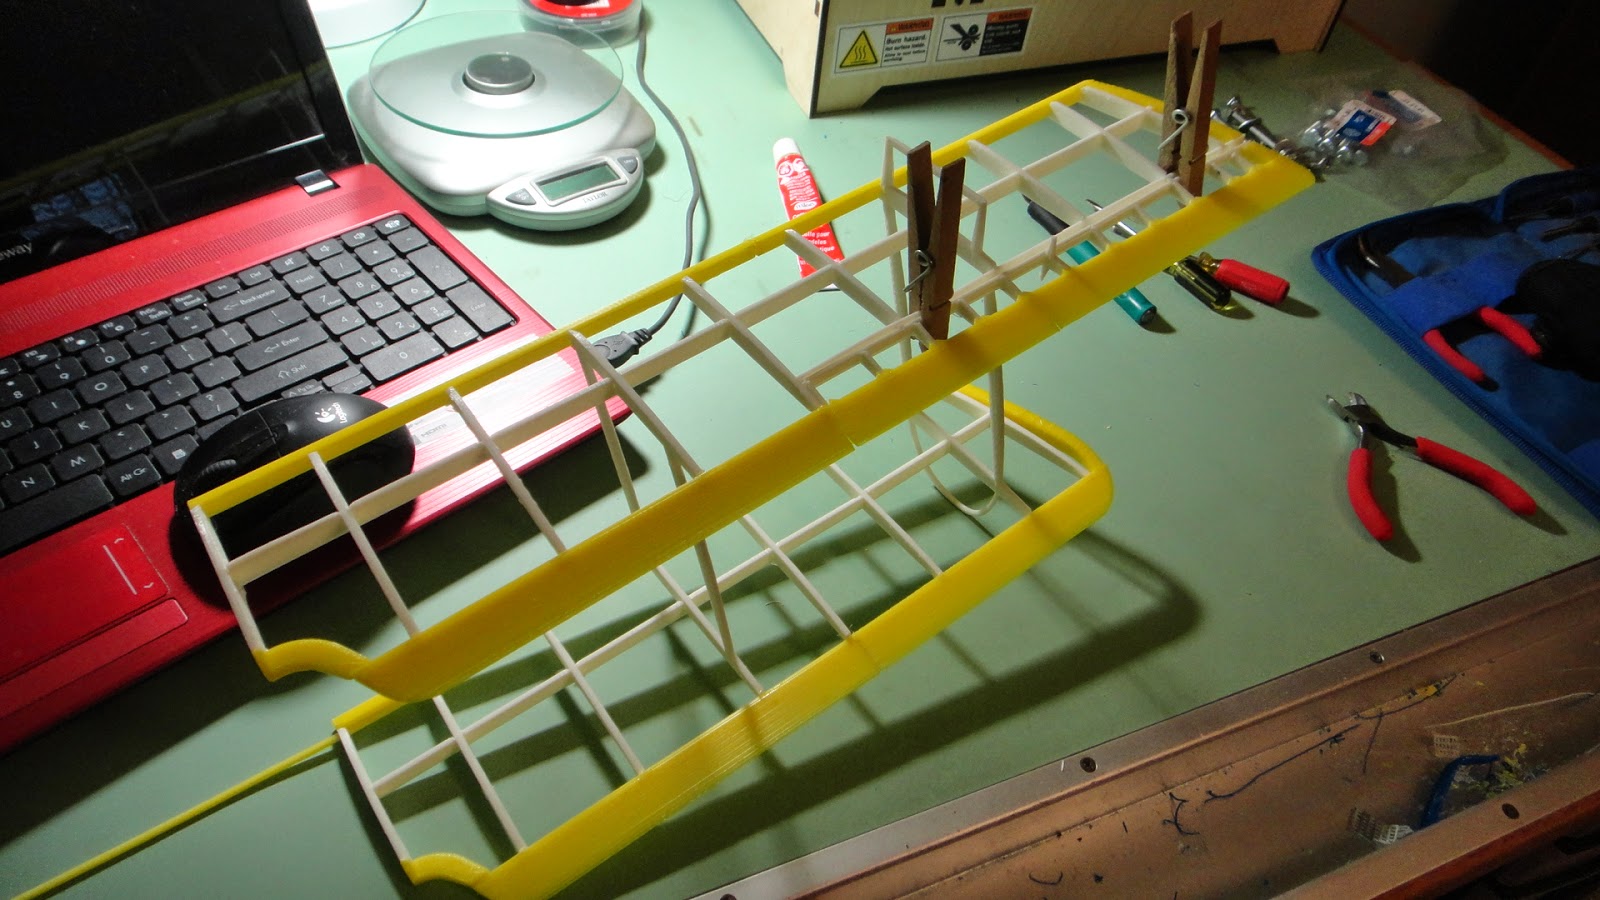
Before I added the lower wings to the upper wing I just had to see what the upper wing would look like once it was glued together.  Here in this photo is how it will look.  The clothes pins are just there to get this shot as the wing will not be totally glued and joined until I get the fuselage put together.  Still quite impressive as the wing at this point is almost three feet long.  The outer sections of the wing that still need to be assembled are the aileron assemblies. These have a bunch of small parts that will need to be assembled similar to how the wings were made and then glued on to the upper wing.  This assembly will be even more detailed when they are in place. 


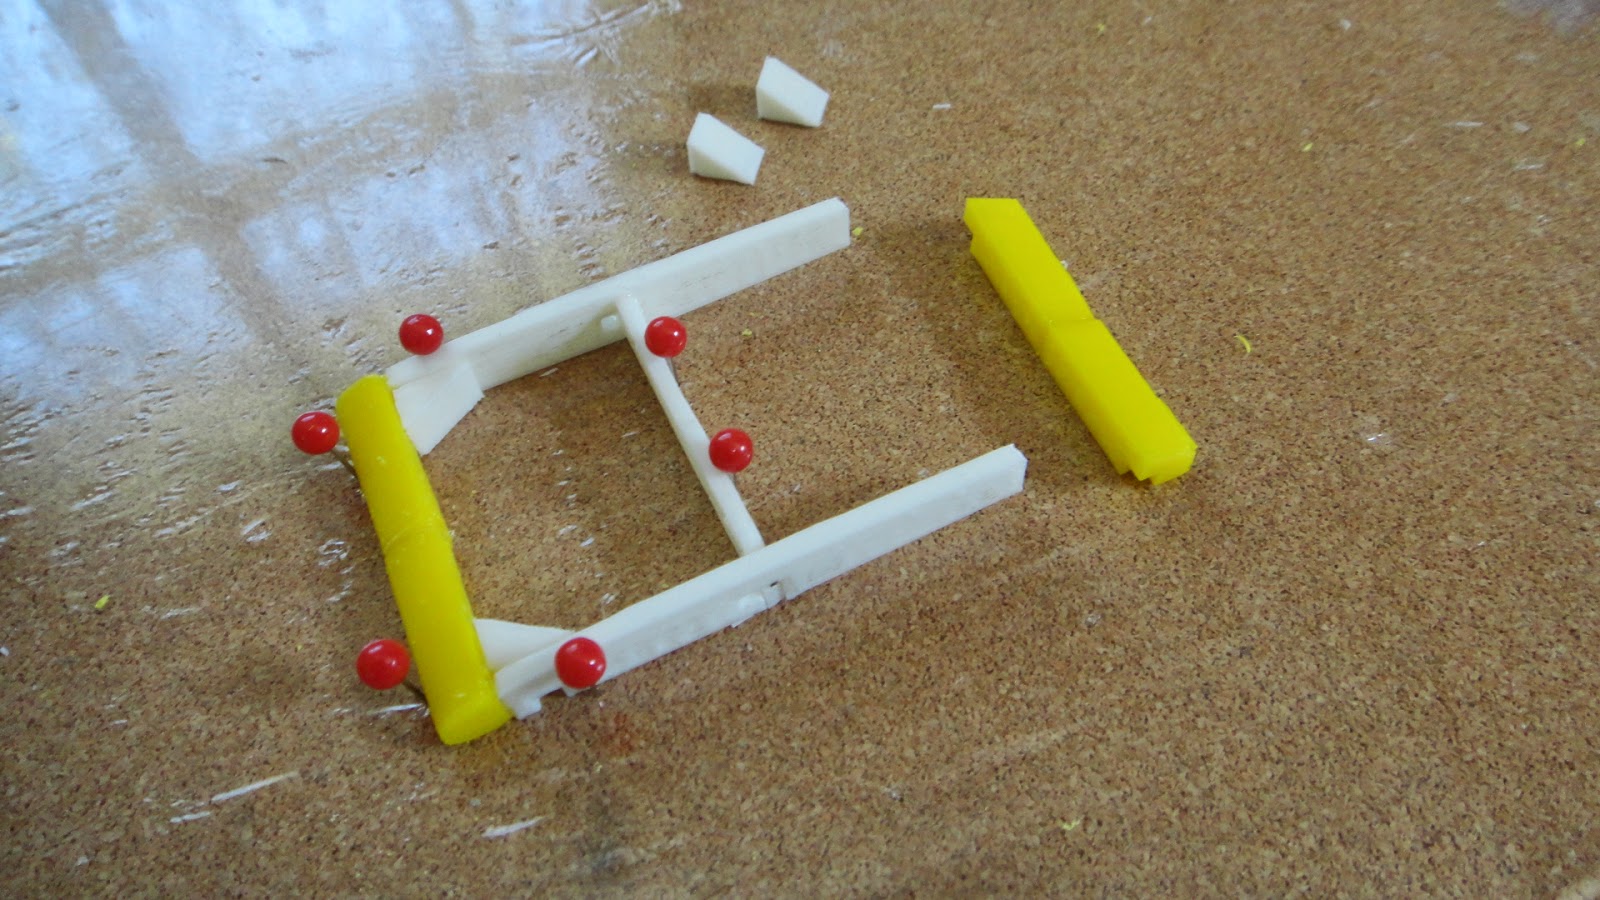
Here the lower wings are nearing completion.  As before everything needs to be pinned down to hold it all into place for gluing.


This is a good shot of one side of the upper and lower wings finally being joined together,  It was a real head scratchier to try to figure out how to get this all put together.  The best way I can describe it is this.  You buy a model airplane kit only to find that the directions to build it are in Chinese or Russian or there are no directions at all.  Now try and build it anyway.   This will give you and idea of what I am trying to work out.  The plus side to this is that I designed the model from scratch so I at least have an idea of how it should go together. 


Here's another good view of the other side of the wing assembly.  I'm glad I decided that I will not cover the plane but rather leave everything bare as you see it.  Will make an interesting model once it is all together.  The next portion of the assembly will be to start working on the fuselage.  Hopefully it will be a little simpler to assemble than the wings.  Just will have to see how it goes and I'll post that portion of the build at a later time. Enjoy the photos.

Wednesday, September 3, 2014

3D Printed Jenny Aircraft Top Wing Starting To Take Shape

With some careful planning and a steady hand I started putting the upper wing of the 3D printed Jenny aircraft model together yesterday and this morning.  I was happy to find that the parts are fitting well together. This is a plus as this portion of the model looked to me to be a real puzzle for sure to make it work.  Here is how it looks so far.


After I had removed all of the pins that held the upper left wing assembly in place it was a simple task of separating the two sections.  The plastic wrap that was covering the cork bulletin board worked perfectly as the parts lifted easily from the surface of the plastic.  Not one piece stuck  to it.  I like it when a plan works out perfectly.  The next part of the assembly called for me to install the two wing struts into these two sub-assemblies. The inner ribs in the two assemblies had not been glued in place as the struts needed to be inserted around the center spar first.


The struts for the wing slide perfectly into place and it was a simple matter of applying modeling glue to the parts to hold it all together.


With the help of a little painters tape the first part of the assembly only needed to be set aside to let the glue dry for a couple of hours.


This outer section of the wing needed just a clothes pin to hold the part in the correct position until it too had dried. 


Once both sub-assemblies of the upper left wing had dried I had to figure out how best to join the two together.  The struts that extend down below the wing actually help solve this problem by supporting the entire assembly.  It was just a matter then of making sure the wing assemblies lined up with each other so the finished assembly would be straight when the glue had been applied and left to dry.  The plus side again in having the assembly work on the bulletin board is that I can move it from room to room if I have to and not disturb anything in the process.  This part of the assembly is a nice start so far and it looks promising to see it starting to take shape so quickly.  I'll let everything dry and will have to repeat the process for the right side of the wing.  A small mid-section of the wing will need to also be assembled but will not be as difficult to make as these assemblies have been.  I'll post more as the top wing gets closer to completion. 

Tuesday, September 2, 2014

3D Printed JN4D Jennny Aircraft Parts, Parts, Parts....etc.

The last few days have been a massive push to print all of the parts for the 3D Jenny aircraft model project.  Total time for this project has been climbing with this push.  Design time was 50 hours and now with the printing of all of the parts for the model this time has doubled to 100 hours and counting.  This is how all of these parts look so far.


This photo gives you a good idea of the scale of a couple of the parts for the plane.  Above the dime in the photo is the frame for the windshield.  The seat with the white cushion turned out perfectly and will look great in the model once it has been completed. The grids that these parts are sitting on are called rafts and are printed on the heated platform of the 3D printer so that the part being made stays where it needs to be while it is being made.  The rafts are removed when the parts are being set up for final assembly.


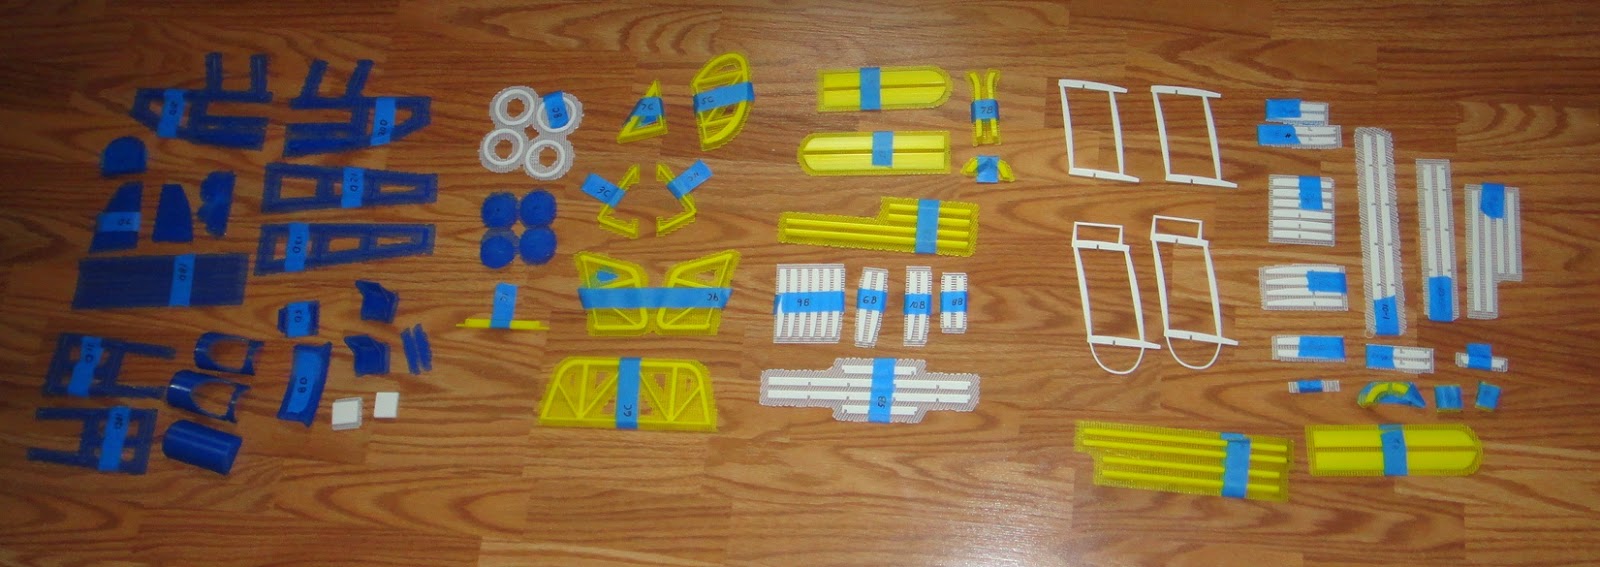
This photo shows almost all of the parts that will be needed for the model.  I shot this photo yesterday only to find out that I had not yet printed the parts for the ailerons and the engine.  So back to printing was the order of the day.  With all of the parts printed the total for the model comes up to 177 parts. No worse than some of the other projects that I've put together over the past few years but still a pile of parts.  So you can see I will have my work cut out for me.


In this photo you can see as before that I have the rafts for the parts still on everything.  I also had to label all of the various parts to keep everything straight for the final assembly.  It will help for sure. 
Each of the parts are laid out for various sub-assemblies such as Top Wing, Bottom Wing, Tail Section, Fuselage..etc.


To start the assembly I pulled  an old bulletin board out of mothballs that I had stuffed away in a closet.  This makes a good working surface to start assembly of the model.  I covered the cork surface of the board with plastic wrap.  This will keep the parts from being glued to the bulletin board and be pinned down to keep every thing lined up properly during assembly.


I used push pins to hold the parts for the upper left wing assembly 'as you can see in the photo above.  I'm sure glad that I have a pile of these pins to do the job.  It will take a while to get everything lined up correctly for each section that needs to be put together. The missing ribs in this section of the wing will be added in the final assembly of the model once the upper and lower wing struts are added to the model and the wings are combined.  Will be a real trick to get it all set up.  Just will have to take my time with it. 


These last two images are what the model will look like once I get it assembled. I originally was going to have the wheels in blue but this had to be changed once I got the parts 3D printed. They did not turn out exactly the way I wanted so I am in the process now of sanding the parts smooth and prepping them for red paint.  I also was going to have the seat in red but decided that the blue and white layout looks a lot nicer.  
  Once I get the model assembled I will look into adding the flying wires that were on the real plane.  This will be a task for sure but will add a lot of detail to the model if I can get it all put together that way.  Again the model will have a three foot wing span and will be almost two feet long.  Should be pretty impressive for sure. I'll post more photos of the project as progress is made with the assembly portion of the Jenny.  Enjoy these photos in the mean time.