Thursday, October 25, 2012

The Tinker's Workshop Makerbot Replicator 3D Printer

For some time now I have been asked by a lot of people here on the blog as well as out in the real world the question "What is a 3D printer?"  For me to answer that question has become routine and quite simple to explain what it is and what it can do.  This is obvious of course if you have been following my blog here over the past year or so.  I am fortunate enough to be able to own one of these beautiful machines and am capable of creating pretty much anything I can dream up.  Case in point is one of the last projects I posted of my 1/6th scale electric car model complete with full suspension, rack and pinion steering, disk brakes and even folding seats.  This has been received very well by the 3D printing community from around the world and it was a lot of fun designing and creating it using my Makerbot Replicator 3D printer.  
  This being said I currently am working on another new project that I will post when I get farther along with it and an idea popped into my head yesterday while printing part for this project.  I quickly pulled out my trusty iPad and shot video of ten parts being made all at the same time on my 3D printer.  I thought it would be of interest to anyone who wanted to see this machine actually make some parts.  I shot enough video to put together a two minute mini show that I edited on my iPad as well.  Complete with titles and a music background.  Now when someone asks you if you know what a 3D printer is you can say "Yes I do and I even have seen one print parts!"  So enjoy the video I put together and let everyone know that you learned something new today.


Click the YouTube button for a bigger view of the video.
Tuesday, October 23, 2012

Motorcycle Cargo Trailer Project Final Part 9

In this final part of the motorcycle cargo trailer project I will cover the painting of the trailer and final photos of what it looked like once it was completed. So once again let's get started.  


Here is the trailer finally seeing the light of day on it's wheels and getting ready to be hauled to the paint shop.  The blueish white kind of looks like camoflaage at this point but it will soon be sanded and primed for new paint.  I was very pleased to see it take shape with all that had been completed over the eight months that it took to get this far.  Total hours at this point of work came up to 425 total.  This did not include the hundreds of hours it took just to design the trailer. 


The trailer is on the trailer!  My cargo trailer looks small compared to what it being hauled on when these photos were taken.  But in reality the trailer was quite large and could haul a sizable load.


My brother who has been doing body work on cars for years was my paint man and so it was a no brainer to turn this portion of the trailer project over to him.  During the winter months he worked on prepping the trailer for paint and brought the body up to perfection with this knowledge and skill of auto body work.  


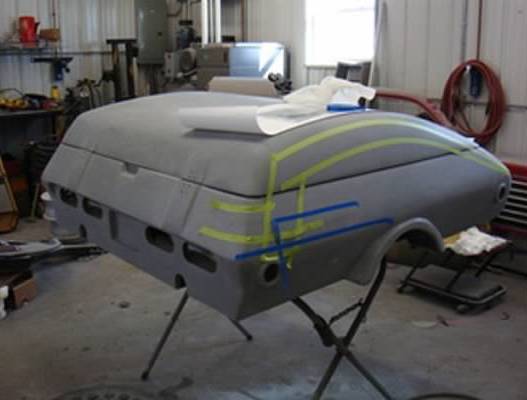
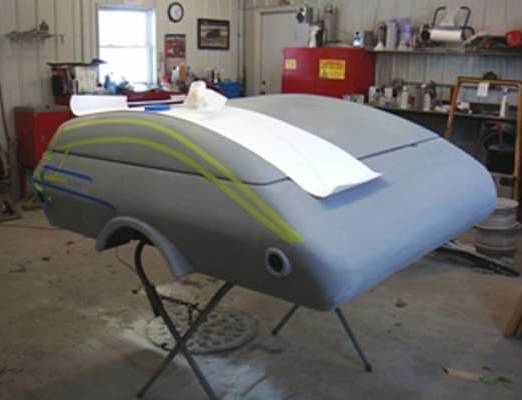
These two photos show the start of setting up the paint scheme that I had decided on for the trailer.  This alone was a long process as the trailer like any other vehicle can be painted a million different ways and colors.  So I was more than happy to have someone that I trusted to help me get this part of the project done right.


Here are some good views of the trailer body all smoothed out ready for paint.  I also was very happy on how it all looked with the little details  such as the tail light assembly, fenders, and latch mounts that I had been working on looking so nice even before painting had begun.


 Here the final layout for the paint is being laid down on the body of the trailer.  An interesting process to see first had.  My brother Carl is an expert when it comes to this part of the project so I became a spectator at this point as was very confident that he would do a much better job that I ever could.  I am an expert in a couple of different fields but body work and painting is not one of them.  You simply cannot be an expert in every field of interest.  I would have to have a couple more lifetimes to accomplish that feat.


The first of many coats of white paint are being applied to the primed body.  The blue tape that had already been laid down on the body was already covering the maroon stripes that Carl had already completed before hand.


It was strange for me to see the body in color now after all of the months of working on it and only seeing the blue styrofoam and fiber glass.  Looks good at this point already.


The blue tape is removed to reveal the maroon stripes for the first time!  An exciting thing to see after all the work that had been put into this project.  The body was painted with several white base coats and then several more coats of pearliscent white.  The stripes look black in these photos but are actually are maroon to match my motorcycle. 


Once the pearl paint and the stripes had cured enough four or five coats of clear were sprayed on to top to give everything a nice shine worthy of the project.


 This is what it is all about.  The planning, designing, blood, sweat, and tears to finally call this project done.


A good shot of the rear of the trailer with the newly chromed bumper and LED tail lights mounted.  Notice the chrome locks on the lid of the trailer.  


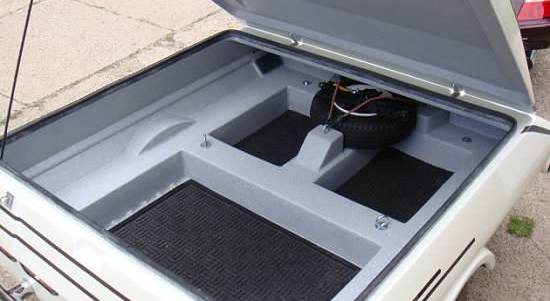
Even with the lid of the trailer open the rig looks great.  The prop rod to hold up the lid was from a 65' Mustang.  It was the prefect size and shape for the project. 


One last thing was needed to put the cherry on top of the project.  Custom coolers!


A good friend of mine had followed along with me on this project from beginning to end as I was building it and asked me if the coolers had the sun and moon on them for hot and cold drinks.  I cracked up and said of course what better reason to make custom coolers for this beautiful trailer.  Through it all I learned a lot about working with fiber glass and composite construction in general.  It led the way to other projects like the fifteen foot three section kayak that I have posted on this site.  
  I hope you have learned something new as well with all of the postings about my trailer project and have come away with the knowledge that it does not take a rocket scientist to create something like this.  Just a lot of patience and the willingness to put the effort into it to see it to completion.  Enjoy and keep tinkering!

Monday, October 22, 2012

Motorcycle Cargo Trailer Project Part 8

Today in this section of the motorcycle cargo trailer project we will look at the mounting of the lid for the body, rear bumper mounting, lid latches and protective undercoating of the body.


The lid hinges here are mocked up on wooden mounting blocks.  I found the hinges online at a supply house that handles parts for boats.  I thought that if it could stand being on a boat it would work well on the trailer.  Less likely to rust.  


The area for cutting is laid out on the one the foam surface of the body of the trailer.  The two locations for the hinges is where the additional panel was added at the front of the trailer body opening. (see earlier post on this panel placement)


Let the foam cutting start once again.


The front hinge is test fitted into the new opening to make sure everything looks and works right.


The hinge is removed and only the lower mounting block is puttied into place using a resin putty mixture.  This mount once it has cured will be totally glassed into place to seal it completely from the elements.


The hinge and upper block are reattached once again to check alignment and clearances.


Here one of the hinges is closed and shaped to work out how the mount will look when done.  


 The lid of the trailer was put in place just to see where I was headed with the hinge mounts.  This was a trial and error kind of thing to work out.  As I was experimenting a this point to figure out what would work and look good all at the same time.  


This is a good view of the hinge mounts that are glassed in and cutouts on the lid.


The upper hinge block is now cut down to match the angle of the top lid surface and a small foam wedge is sitting alongside to fill the upper void.


These two photos show the lid in place over the upper hinge block without the foam wedge and with it in place.


At this point the hinge assembly is covered with plastic film so that all the upper wooden block and foam wedge can be bonded into place using fiber glass resin putty.  The plastic film is resting between the upper and lower hinge blocks so that when I bonded the lid to the upper block it would not glue the hinge shut.  This would be very bad as it would make the assembly useless at that point.  


Once the bonding putty had dried it was then sanded smooth and the upper mounting block could be glassed into place for a strong, straight, tight fit.  The hinges now were in place and the lid could be removed completely by just removing the mounting bolts for the hinges.  Each of the holes in the wooden block had steel inserts in them so that if the lid needed to be removed it would not just have wood screws holding the lid on.  Otherwise over time the mountings could fail and you would have a heck of a time trying to fix or make a new hinge mount.


Here is a computer image of the design that I came up with for the rear bumper of the trailer.  In an earlier post I had told you that my first design of a bumper was to have it incorporated into the body of the trailer.  This was not a good idea as it would be difficult to not have the bumper damaged and then you would have to repaint the entire body of the trailer because of it.  What I did here was use a steel bumper that would mount directly on to the frame give it better structural strength and protection from damage. 


It took me some time online to find the exact parts that I needed for the end caps of the bumper.  These were hollow half balls of steel and were a real trick to find.  The bumper is made from standard muffler pipe that is cut and welded together using end plated that would mount the assembly to the frame.


These two photos show the bumper temporarily mounted to the frame with the body in place and with it moved so that the mount could be more easily photographed.


Next the rear chrome hasp mounts were created to lock the lid of the trailer down.  I struggled for the longest time trying to figure out an inexpensive and simple way to lock the trailer.  I originally wanted a lock system similar to what you would find on a car.  This proved to be way to complicated and expensive to duplicate so I came up with this idea of using two chrome hasps that would have locks on them.  Simple, inexpensive and easy to build.


The mounts for the chrome hasps have a mounting block similar to all the mounts on the trailer with mounting holes for the stainless machine screws.  In each hole once again was a steel threaded insert so that you could have a sold steel mount that would not destroy itself over time.  The mounts were then wrapped in foam around the outer perimeter to give it a nice look when glassed.


Her the trailer is prepped with paper and tape so that the underside of the body could be painted with a protective truck bed liner material.


 This is a black rubber compound that you roll on with a bush to protect a truck bed.  It worked out perfectly with the trailer as it gave a nice finished look to the underside of the body and protected it from rocks or what have you that the tires would toss up into the glassed fenders.  Again inexpensive and very strong so it was a great idea that worked out very well.

  So once again with this installment of this project I've managed to show you some pretty complicated assemblies and simple solutions to head toward completion of the motorcycle cargo trailer.  Enjoy.